How to Change the Aux Belt on a Citroen Dispatch: Step-by-Step DIY Guide
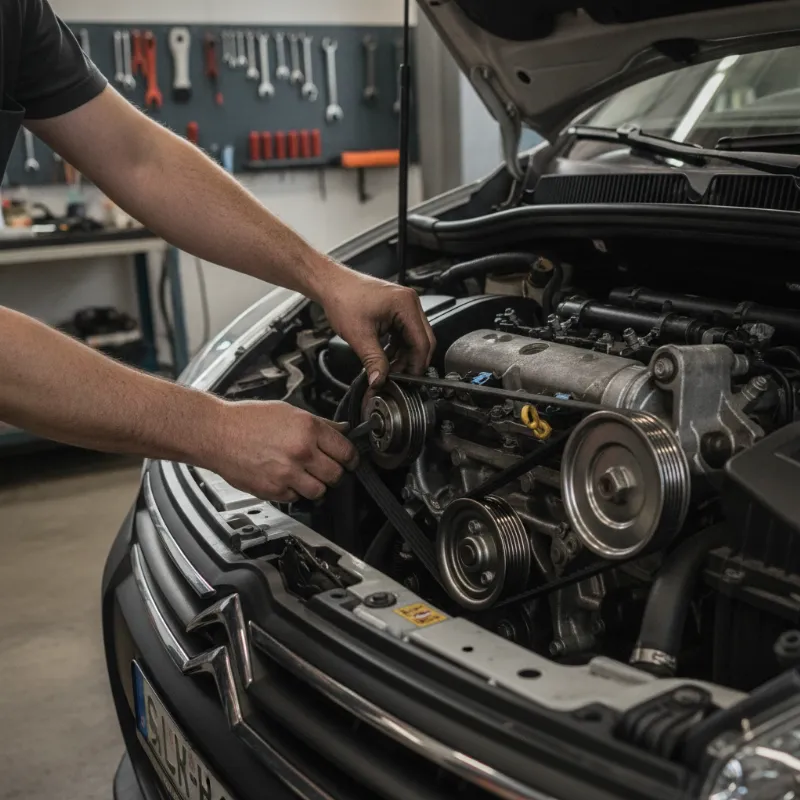
What the aux belt does on a Citroen Dispatch
The auxiliary belt — often called the aux belt, serpentine belt or ancillary drive belt — is the long ribbed rubber belt that snakes around the front of your Citroen Dispatch's engine. Driven by the crankshaft pulley, it powers essential ancillary components including the alternator, power steering pump, air conditioning compressor and, on some variants, the water pump. Without it, your van simply won't charge the battery, your steering will go heavy and the cabin climate control will stop working.
Unlike the cambelt (timing belt), which is hidden behind a cover and governs engine timing, the aux belt sits exposed at the front of the engine bay and is designed to be a routine service item. On the Citroen Dispatch, most manufacturers and independent specialists recommend inspecting the aux belt every 25,000 miles and replacing it around 60,000–75,000 miles, or sooner if you notice cracking, glazing, fraying edges or a persistent squealing noise on cold starts. Catching a worn belt early is far cheaper than dealing with a snapped one at the side of the M25.
Tools and parts you'll need
Changing the aux belt on a Citroen Dispatch is well within the reach of a competent home mechanic, provided you have the right kit laid out before you start. You'll need a decent socket set (particularly 13mm, 15mm and 16mm), a long breaker bar or half-inch ratchet, a torque wrench, a trolley jack and axle stands, wheel chocks, and a set of Torx bits. A belt tensioner locking pin (or a suitably sized drill bit as a substitute) is essential for holding the tensioner back while you slip the belt on and off.
You'll also want a mirror and a torch — access is tight on the Dispatch, especially on later Euro 5 and Euro 6 models where the engine bay is heavily packaged. A phone camera is genuinely useful for photographing the belt routing before removal. Finally, pick up a fresh belt from a reputable brand such as Gates, Dayco or Continental, and consider replacing the tensioner pulley and idler at the same time if either shows any sign of bearing wear.
Identifying the right belt for your Dispatch engine (1.6 HDi vs 2.0 HDi)
Citroen has offered the Dispatch with several diesel engines, and belt length and rib count differ noticeably between them. The 1.6 HDi (DV6 family) generally uses a six-rib belt around 1,750mm long when the vehicle is fitted with air conditioning, while the 2.0 HDi (DW10 family) typically runs a longer belt to accommodate its different pulley layout. Non-air-con vans use a shorter belt with a simpler routing that bypasses the compressor entirely.
Before ordering, note down your registration, VIN and engine code (stamped on the block or listed on your V5C), and cross-reference with your parts supplier's catalogue. Getting the wrong belt is the single most common mistake DIYers make — a belt that's 20mm too long will slip and squeal within days, and one that's too short simply won't fit around the tensioner arc.
Step-by-step: changing the aux belt on a Citroen Dispatch
With the van parked on level ground, the handbrake firmly applied, the ignition off and the keys well out of the way, chock the rear wheels and loosen the front nearside wheel nuts. Jack the front of the van up, support it on axle stands, and remove the nearside front wheel. You'll then need to remove the plastic wheel arch liner — a mix of Torx screws and plastic trim clips hold it in place — to gain access to the crankshaft pulley and the belt run.
Removing the old belt and tensioner check
Before you touch anything, sketch or photograph the exact routing of the existing belt around every pulley. It's astonishing how quickly the layout becomes confusing once the belt is off. Locate the automatic tensioner pulley — on the Dispatch it sits towards the top of the accessory drive — and fit your breaker bar to the tensioner's centre bolt or hex point. Rotate the tensioner against its spring to release tension on the belt, then insert your locking pin through the alignment hole to hold it in the released position.
Slip the old belt off the smallest pulley first (usually the alternator or idler) and work it free from the remaining pulleys. With the belt off, spin the tensioner, idler and alternator pulleys by hand. They should turn smoothly and silently — any roughness, wobble or grinding means the bearing is on its way out and the pulley must be replaced before the new belt goes on. Inspect the old belt too: cracks running across the ribs indicate age, while missing chunks or shiny glazing point to a seized ancillary that will destroy your new belt just as quickly.
Routing and fitting the new auxiliary belt
Compare the new belt against the old one on a flat surface to confirm identical length and rib count. Feed the new belt around the crankshaft pulley first, then work upwards through the routing you photographed earlier, making sure every rib sits cleanly in every pulley groove. The last pulley you loop it over should be the tensioner or a smooth idler — never try to force it onto a ribbed pulley last, as you'll damage the belt's fabric backing.
Double-check the belt is centred on every pulley with no ribs hanging off the edge. Release the tensioner by pulling the locking pin out with your breaker bar still holding load, then let the tensioner arm swing back onto the belt gently. Rotate the engine two full turns by hand using a socket on the crankshaft bolt (clockwise as viewed from the pulley end) to seat the belt, then re-check alignment. Refit the wheel arch liner, wheel and any splash guards, lower the van, torque the wheel nuts to the specified figure and start the engine. Listen for 30 seconds — you should hear nothing but the normal diesel clatter.
Common mistakes and when to call a mechanic
The most frequent DIY errors are ordering the wrong belt length, forgetting to check the tensioner and idler bearings, and mis-routing the belt so it runs on the smooth back face of a pulley instead of the ribbed side. Any of these will show up as noise, vibration or a warning light within a few miles. Always take five extra minutes to verify your work before you drop the van off the stands.
Call a mechanic if the tensioner won't hold with a locking pin (a sign the internal spring has failed), if a pulley bolt is seized or rounded, or if you discover an oil leak from the crank seal or cam cover while you're in there — running a new belt over oil-contaminated pulleys will ruin it in weeks. Equally, if your Dispatch is approaching cambelt-change mileage, it makes sense to have both belts done together by a garage, as the labour overlap is significant.
Thinking of upgrading? Explore our Citroen Dispatch range
DIY servicing is a great way to keep an older van on the road, but there comes a point when the cost and downtime of ongoing repairs starts to outweigh the appeal of a newer model with a fresh warranty. If your Dispatch is starting to feel its age, it's worth a look at the current generation — improved payload, better fuel economy, modern safety kit and lower running costs can transform your working day.
Browse our latest Citroen Dispatch lease deals to compare monthly costs against the running expenses of keeping your existing van going. Whether you're a sole trader or running a small fleet, our team can talk you through spec, mileage allowances and delivery timescales so you can make the switch with confidence.
FAQs
How do you change the auxiliary drive belt on a Citroen Dispatch van?
Park on level ground, chock the wheels, jack up the front nearside and remove the wheel and arch liner to access the belt. Photograph the routing, then use a breaker bar to rotate the automatic tensioner and insert a locking pin to hold it back. Slip the old belt off, check the tensioner and idler pulleys spin freely, then route the new belt around every pulley following your photo, finishing on the tensioner. Release the tensioner, rotate the engine two turns by hand to seat the belt, refit the arch liner and wheel, and start the van to check for noise.
How often should the aux belt be changed on a Citroen Dispatch?
Most specialists recommend inspecting the aux belt every 25,000 miles and replacing it between 60,000 and 75,000 miles. Change it sooner if you can see cracking across the ribs, glazing, fraying edges, or hear squealing on cold starts.
Is the aux belt the same as the cambelt on a Citroen Dispatch?
No. The aux belt (auxiliary or serpentine belt) drives external ancillaries like the alternator, power steering pump and air con compressor, and sits at the front of the engine. The cambelt is hidden behind a cover and controls engine valve timing. They are separate items with different replacement intervals, and the cambelt is a much bigger job.
How long does it take to change the aux belt on a Citroen Dispatch?
A confident DIY mechanic with the right tools can typically complete the job in around 1.5 to 2 hours. A garage will usually quote around an hour of labour. Allow extra time if you plan to replace the tensioner or idler pulleys at the same time.
Can I drive my Citroen Dispatch with a worn or broken aux belt?
You should not. A worn belt can snap without warning, which will immediately stop the alternator charging, make the steering very heavy and disable the air conditioning. On engines where the aux belt also drives the water pump, a failure can quickly lead to overheating. If the belt has snapped, recover the van rather than driving it.