How to Change the Door Locks on a Citroen Dispatch: A Step-by-Step Guide
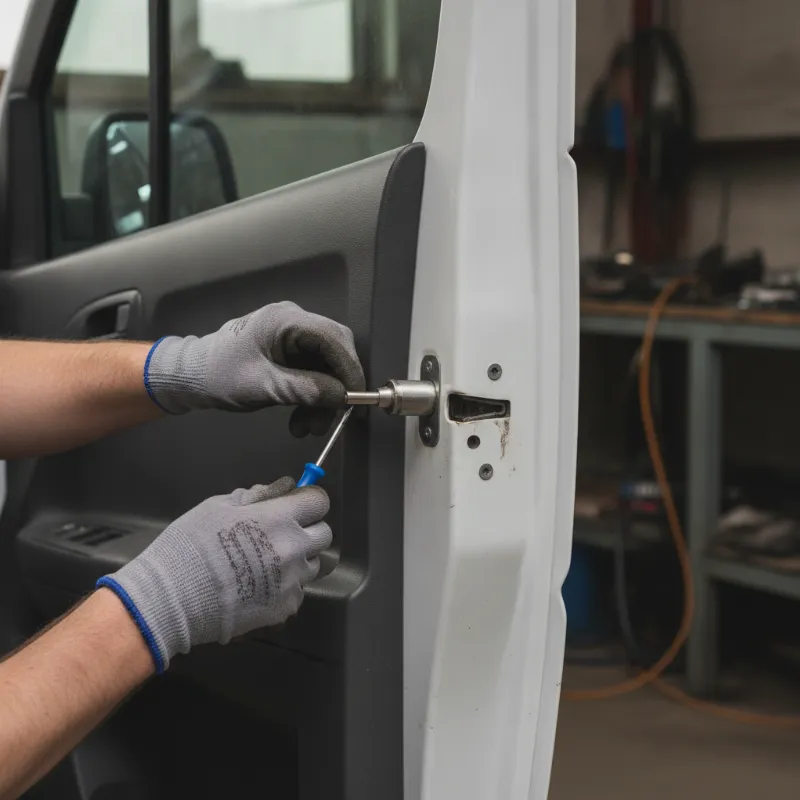
Why you might need to change the door locks on a Citroen Dispatch
The Citroen Dispatch is a hard-working panel van, and its door locks take a beating over the years. Whether you're dealing with a jammed barrel that won't turn, a snapped key stuck inside the cylinder, or the aftermath of an attempted break-in where the lock has been drilled or forced, replacing the door lock is often the only sensible fix. Older Dispatch vans in particular can suffer from worn tumblers that make the key feel loose or refuse to engage, and central locking motors inside the lock assembly can fail with age.
You might also want to swap the locks if you've bought a used Dispatch and only received one key, or if a previous key has been lost and you can't be sure who might still have access to it. For tradespeople carrying tools and stock in the load area, that peace of mind is worth the couple of hours it takes to change a lock. The good news is that on most Dispatch models the job is well within the reach of a competent DIYer with the right tools and a bit of patience.
Tools and parts you'll need
Before you start pulling the door apart, gather everything you need on a clean workbench or dust sheet. Rushing off halfway through the job to find a Torx bit is the fastest way to lose a spring clip inside the door skin, so preparation matters more than raw mechanical skill here.
Replacement lock barrel or full lock set
First decide whether you need just the lock barrel (the cylinder the key goes into) or the complete lock assembly including the latch and central locking motor. If your key still turns but the mechanism inside the door won't release the latch, you likely need the full assembly. If the key is worn or snapped but the door still locks and unlocks electrically, a replacement barrel may be enough. Always quote your VIN when ordering parts for a Citroen Dispatch, as there are variations between generations (the pre-2007 Dispatch, the 2007–2016 model, and the current shape share very little between them). Genuine Citroen parts are the safest bet, but reputable aftermarket suppliers offer decent alternatives at a lower price. If you want the new lock to work with your existing key, order a barrel that comes coded to your key number or ask a specialist to re-pin it.
Basic hand tools and trim removal tools
You'll need a set of Torx bits (typically T20, T25 and T30 for the Dispatch), a Phillips screwdriver, a small flat-blade screwdriver, and a set of plastic trim removal tools to lift the door card without cracking it. A pair of long-nose pliers helps with the lock rod clips, and a torch is invaluable for peering into the dark cavity inside the door. Have a small magnetic tray or pot handy to keep screws and clips organised, and wear a pair of thin work gloves — the inside of a door skin is full of sharp metal edges that will happily open a knuckle.
Step-by-step: removing the old door lock
With the van parked on level ground, the window fully up and the door open, disconnect the battery negative terminal before you start. This is especially important on Dispatch models with electric windows and central locking, as you don't want to short anything out while you're rummaging inside the door.
Taking off the door card
Start by prising off the small trim caps around the interior door handle and the armrest to expose the retaining screws. Undo these with the appropriate Torx or Phillips bit and set them aside. Next, use a plastic trim tool to work your way around the outer edge of the door card, releasing the plastic clips one at a time. Work slowly — the clips are brittle, particularly on older Dispatches, and replacements aren't always easy to source in the exact right size. Once the card is free around its perimeter, lift it upwards to release it from the top of the door frame, then tilt the top away from the door and disconnect any wiring plugs for the speaker, window switches or door pin. Peel back the plastic vapour barrier carefully so you can refit it later without tears — a bit of butyl sealant will help it re-stick.
Disconnecting the lock rods and wiring
With the vapour barrier out of the way, you'll see the metal lock rods running between the exterior handle, the interior handle and the lock assembly itself. These are held in place by small plastic clips that flip open — use a flat-blade screwdriver to pop them, then slide each rod out of its socket. Take a photo before you start so you know which rod goes where when it comes to reassembly. Next, unplug the wiring connector that feeds the central locking motor and any deadlock or alarm sensor built into the lock. The plugs usually have a small tab you press to release; don't force them.
Releasing the lock assembly from the door
The lock assembly is held to the door shut face by three Torx bolts, visible from the edge of the door when it's open. Undo these — they can be tight, so brace the door and use a good-quality bit to avoid rounding them off. Once the bolts are out, manoeuvre the whole lock unit down and out through the large access hole in the door skin. It's a bit of a puzzle to get it out the first time because of the rods and the motor housing, but tilt and rotate it and it will come free. If you're only replacing the exterior lock barrel, this is usually accessible from behind once the assembly is out, secured by a single retaining clip or a small grub screw depending on the year.
Step-by-step: fitting the new door lock
Compare the new lock side-by-side with the old one before fitting anything. Check that all the mounting holes line up, that the rod sockets are in the same positions, and that the electrical connector matches. Any differences suggest the wrong part has been supplied, so it's much easier to send it back now than after you've bolted it in.
Feed the new assembly up through the access hole and locate it against the door shut face. Start all three Torx bolts by hand before tightening any of them fully — this keeps everything aligned. Once the assembly is snug, reconnect the wiring plug, then clip the lock rods back into their sockets in the same order you removed them. Give each rod a gentle tug to make sure it's properly seated; a rod that pops off later means taking the door card off all over again.
Coding and testing the new barrel
If your replacement barrel came uncoded, you'll need to have it pinned to match your existing key, or accept that you'll be carrying a separate key for that door. Some newer Dispatch models with keyless or transponder-based systems may also require the immobiliser to recognise a new key, which is a dealer or auto-locksmith job. With the assembly fitted, reconnect the battery and test everything before you refit the trim: turn the key in the lock from outside, operate the interior handle, and cycle the central locking from the key fob. The door should lock, unlock and open smoothly with no binding. Only when you're satisfied should you refit the vapour barrier, reconnect the door card wiring, clip the card back into place and reinstall its screws and trim caps.
Common problems and troubleshooting tips
The most frequent issue after a lock change is a door that locks but won't unlock from the inside, which almost always means a lock rod has been fitted the wrong way round or hasn't fully clicked into its clip. Take the card off and check each rod against the photo you took earlier. If the key turns but the door won't open, the exterior handle rod may be too long or too short — some aftermarket assemblies have adjustable rods, and a quarter-turn on the plastic clevis usually cures it.
Central locking that works on every door except the one you've just repaired points to a wiring plug that isn't fully seated, or occasionally a blown fuse if something shorted while the battery was still connected. If the key feels stiff in the new barrel, a tiny amount of graphite lock lubricant (never oil, which attracts grit) will free it up. And if water starts appearing in the footwell after rain, the vapour barrier hasn't been resealed properly — worth putting right straight away before the door card or floor carpet gets damaged.
When to get a van locksmith or dealer to do it
Changing a door lock on a Citroen Dispatch is achievable at home, but there are situations where calling in a professional is the smarter move. If your van is a newer model with an encrypted key and transponder immobiliser, the new lock and key will need to be programmed to the vehicle using dealer-level diagnostic equipment — this isn't something you can do with a basic OBD tool. Similarly, if the original key has been lost entirely and you have no working key to code the new lock to, an auto-locksmith can decode the remaining locks and cut a fresh key to suit, saving you from replacing every lock on the van.
It's also worth getting a pro involved if the door has been damaged in a break-in attempt, as the shut face or handle mechanism may be distorted and need straightening before a new lock will seat properly. A mobile van locksmith will typically come to you, complete the job in an hour or two, and guarantee the work — often for less than the cost of a full day off the road trying to do it yourself. For everyday wear-and-tear lock replacement on an older Dispatch, though, following the steps above will save you a good chunk of money and give you a van that's secure and back on the road the same afternoon.
FAQs
How do you change the door locks on a Citroen Dispatch?
Disconnect the battery, remove the interior door card and vapour barrier, then unclip the lock rods and wiring plug from the lock assembly. Undo the three Torx bolts on the door shut face, manoeuvre the old lock out through the access hole, and fit the new one in reverse order. Test the lock, key and central locking before refitting the door card. On newer models with transponder keys, the new barrel may need coding by a locksmith or dealer.
How long does it take to replace a door lock on a Citroen Dispatch?
For a competent DIYer with the right tools, budget around two to three hours per door the first time you tackle it. Subsequent doors go quicker once you're familiar with the trim clips and rod layout. A mobile van locksmith will typically do the job in around an hour.
Can I use one key for all the doors after fitting a new lock?
Yes, but only if the replacement barrel is coded to match your existing key. When ordering the part, quote your VIN and key number and ask for a coded barrel, or have an auto-locksmith re-pin the new lock to your key. Otherwise you'll end up carrying a separate key for the replaced door.
How much does it cost to replace a Citroen Dispatch door lock?
A replacement lock barrel typically costs between £30 and £80, while a full lock assembly with central locking motor can run from £80 to £200 depending on model year and whether you go genuine or aftermarket. Add labour of £80–£150 if you're using a mobile locksmith or garage, plus any key coding or programming fees on newer vans.
Do I need to reprogram anything after fitting a new door lock?
On older Dispatch models with a purely mechanical key, no programming is needed — just make sure the barrel is coded to your key. On newer models with a transponder chip or keyless entry, the key and immobiliser may need to be paired to the vehicle using dealer diagnostic equipment, so it's worth checking your specific model year before you start.