How to Change a Radiator on a Citroen Berlingo: DIY Guide
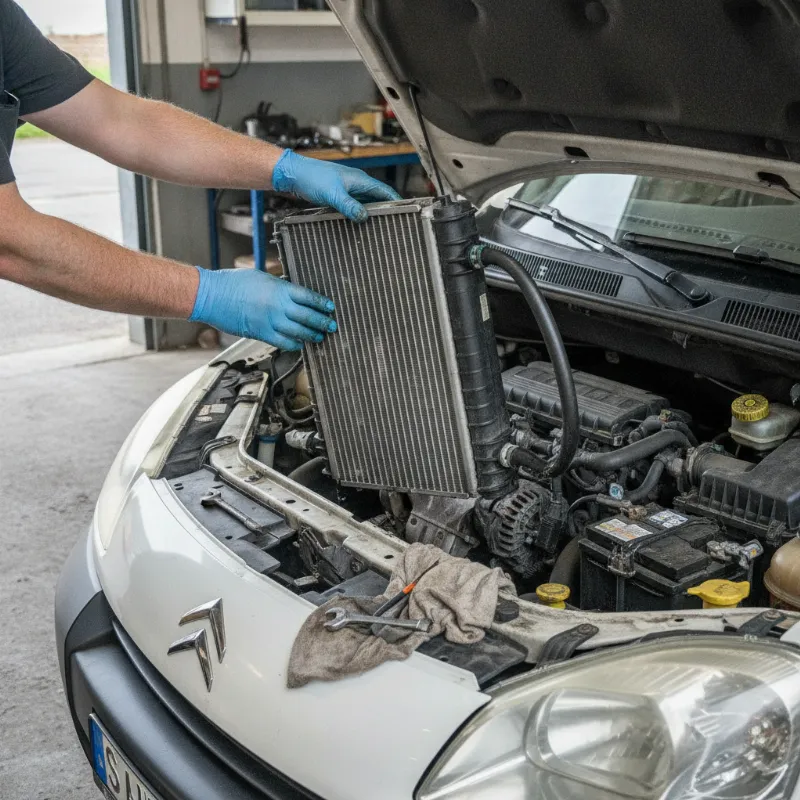
When your Citroen Berlingo radiator needs replacing
The Citroen Berlingo is a workhorse — whether it's the compact van used by tradespeople up and down the country or the Multispace family variant, that little 1.6 HDi or petrol unit under the bonnet works hard. Hard work generates heat, and the radiator is the component keeping everything from boiling over. Over time, plastic end tanks crack, cores get clogged with debris from motorway miles, and internal corrosion slowly restricts coolant flow. Once a radiator starts to fail on a Berlingo, replacement is almost always more sensible than repair — modern aftermarket rads are inexpensive, and patching a cracked plastic tank is a short-term fix at best.
The good news is that swapping a radiator on a Berlingo is well within the reach of a competent home mechanic. You'll need a Saturday, a driveway, some basic tools and a bit of patience — particularly when it comes to bleeding the cooling system afterwards, which is where most DIYers come unstuck. Before you dive in, it's worth being sure the radiator is actually the culprit, because coolant loss and overheating can be caused by any number of components in the cooling circuit.
Common signs of radiator failure on the Berlingo van
The most obvious symptom is a coolant puddle under the front of the van, usually forming overnight or after a run when the system is under pressure. Lift the bonnet and look at the front face of the radiator — you're checking for green, pink or orange staining, wet patches around the plastic end tanks (a very common Berlingo failure point), and any obvious cracks or impact damage to the core from stones thrown up over the years.
Other tell-tales include the temperature gauge creeping higher than normal in traffic, the cooling fan running constantly, sweet-smelling steam from the engine bay, and a header tank that keeps needing topping up with no visible external leak — which can indicate an internal failure allowing coolant to escape past the core. If you spot rusty brown sludge inside the expansion tank or see oil in the coolant, stop and investigate further before assuming it's just the radiator, as those symptoms can point to head gasket problems.
Tools and parts you'll need
Keep it simple. You'll want a socket set (8mm through 17mm covers most Berlingo fixings), a set of Torx bits, trim removal tools for the plastic clips on the grille and bumper, long-nose pliers for hose clips, and a drain pan capable of holding at least five litres. A jack and axle stands make life much easier, as does a torch — the front crossmember area gets dark.
For parts, you'll need a replacement radiator matched to your exact Berlingo variant (engine, year and whether it has air conditioning all matter), fresh coolant to the correct Citroen specification, new hose clips if the originals look tired, and it's worth replacing the top and bottom hoses at the same time if they feel spongy or show cracking near the ends. Have a bottle of deionised water handy for mixing coolant and rinsing spills.
Step-by-step: how to change a radiator on a Citroen Berlingo
Work on a cold engine — ideally one that's been sitting overnight. A hot cooling system is under pressure and will happily scald you the moment you crack open a hose clip. Park on level ground, chock the rear wheels, and give yourself plenty of light and space. The whole job typically takes between two and four hours depending on your experience and how stubborn the fixings are.
Step 1 — Safely drain the coolant
Position your drain pan under the bottom of the radiator. Some Berlingo radiators have a drain tap on the lower corner — turn it anti-clockwise and let the coolant flow out. If yours doesn't have a tap, or the tap is seized (common on older vans), you'll drain the system by carefully releasing the lower radiator hose. Loosen the header tank cap first to break the vacuum and speed up the flow.
Old coolant is toxic to pets and wildlife, so keep it covered and take it to your local recycling centre — don't tip it down the drain. Once flow stops, close the drain or refit the hose loosely to catch any final drips.
Step 2 — Remove the front grille, bumper and cooling fan
Access to the Berlingo radiator is from the front, so the grille and front bumper need to come off. Start by popping the plastic clips along the top of the grille, then unclip the sides. The bumper is held on by screws inside the wheel arch liners, Torx bolts along the top edge under the grille, and clips underneath — take your time and don't force anything, as the plastic tabs snap easily.
With the bumper set aside, unclip the electrical connector for the cooling fan and remove the fan shroud assembly, which is usually held by two or three bolts to the radiator itself. On air-conditioned vans you'll also need to unbolt the condenser from the front of the radiator — do not disconnect any refrigerant lines, just support the condenser out of the way with a cable tie or bungee cord.
Step 3 — Disconnect hoses and remove the old radiator
Slide the hose clips back with pliers and work the top and bottom hoses off the radiator stubs. If they're stuck fast, twist gently rather than levering — a screwdriver against a plastic end tank will crack it, though at this point you're binning the rad anyway. Disconnect the small bleed hose at the top and, on models with automatic transmission, the two transmission cooler lines (have a rag ready for drips).
The radiator itself usually sits in rubber mounts top and bottom, or is retained by two brackets across the top. Lift it straight upward and out of the engine bay. Have a good look at the mounting rubbers while it's out — replace any that are perished.
Step 4 — Fit the new radiator and reconnect
Compare old and new side by side before installation to make sure hose stubs, mounting points and any sensor locations match up. Lower the new radiator into its mounts, refit the brackets, and reattach the hoses with clean clips positioned so you can access them next time. Reconnect the bleed hose, transmission lines if fitted, and reinstall the fan shroud and its wiring.
Refit the condenser (if applicable), bumper and grille in reverse order. Double-check every hose clip is tight and every electrical connector is fully seated before moving on — it's much easier to spot a loose fitting now than after coolant is flying everywhere.
Step 5 — Refill, bleed the system and pressure test
This is the step that catches people out. Mix your coolant to the correct concentration (usually 50/50 with deionised water) and slowly fill through the header tank. The Berlingo cooling system needs proper bleeding — open the bleed screw on the top hose or thermostat housing if fitted, and keep topping up until coolant flows out clean and bubble-free.
Start the engine with the heater set to hot and full fan, and let it idle. Watch the temperature gauge like a hawk. As the thermostat opens you'll see the level in the header tank drop — keep topping up. Squeeze the top hose periodically to help work air pockets out. Run the van up to full operating temperature, let the cooling fan cycle at least once, then let everything cool and re-check the level. Take it for a short test drive, park up, and check underneath for leaks once it's cool.
Model-specific tips: 1.6 HDi, petrol and Multispace variants
The 1.6 HDi diesel is by far the most common Berlingo you'll encounter, and access to the radiator is broadly the same across the range — though later Euro 5 and Euro 6 vans have more pipework crowding the front end, including EGR cooler plumbing that can obstruct the top hose. On these engines, be patient with the bleed procedure as trapped air will cause the temperature gauge to swing wildly and can trigger a limp mode warning.
Petrol 1.4 and 1.6 variants tend to be simpler jobs with fewer ancillaries in the way. The Multispace passenger versions share the same radiator as the panel van of the equivalent year and engine, but note that vehicles with rear air conditioning have additional coolant routing you'll need to bleed carefully. Older first-generation Berlingos (pre-2008) often have seized drain plugs and brittle plastic — budget extra time and possibly new hoses. Always quote your VIN when ordering the radiator to avoid getting sent the wrong variant.
When to leave it to a professional
DIY is rewarding, but there are jobs where a garage is the sensible choice. If your Berlingo has been overheating badly, there's a real risk of head gasket damage or a warped cylinder head, and diagnosing that properly needs a compression test and possibly a sniff test for exhaust gases in the coolant — jobs beyond most home toolkits. Similarly, if the radiator failure is linked to the air conditioning condenser, you'll need a specialist to reclaim and recharge the refrigerant legally.
Automatic transmission Berlingos with an integrated transmission cooler in the radiator need particular care — cross-contamination between coolant and ATF can wreck the gearbox. And if you simply don't have the space, tools, or a full day free, a garage will typically turn the job around in a few hours. There's no shame in outsourcing a repair to keep your van earning.
Looking to upgrade instead of repair?
Sometimes a failed radiator is the final straw on a van that's been quietly costing you money for months. If yours is also due a cambelt, needs tyres, has an MOT looming and the interior has seen better days, it may be time to weigh up the cost of ongoing repairs against the price of a newer Berlingo — or a step up to something like a Peugeot Partner, Ford Transit Connect or a larger panel van if your workload has grown. Newer models bring better fuel economy, up-to-date emissions compliance for city zones, and the peace of mind of a warranty.
Whether you fix it and keep it rolling for another 100,000 miles or trade up to something fresher, the Berlingo remains one of the most practical small vans on UK roads. Good luck with the job — measure twice, bleed thoroughly, and you'll be back on the road by teatime.
FAQs
How do I replace the radiator on a Citroen Berlingo van at home?
Work on a cold engine, drain the coolant into a pan via the drain tap or lower hose, remove the front grille and bumper for access, unbolt the cooling fan and (if fitted) support the AC condenser aside without disconnecting refrigerant lines. Disconnect the top, bottom and bleed hoses, lift the old radiator out of its mounts, then fit the new unit in reverse order. Refill with the correct coolant, bleed the system thoroughly with the heater on full hot at idle, and check for leaks once up to temperature. Allow two to four hours for the job.
How long does it take to change a Berlingo radiator?
For a competent DIYer with the right tools, budget between two and four hours. First-generation Berlingos with seized fixings can take longer, while later models with more front-end pipework or air conditioning add complexity. A professional garage will usually complete the job in around two hours.
How much coolant does a Citroen Berlingo take?
Most Berlingo variants hold between 5 and 7 litres of coolant depending on engine and whether a heater matrix has drained. Always check your handbook for the exact figure and use a coolant that meets Citroen's specification, mixed 50/50 with deionised water unless buying it pre-mixed.
Do I need to bleed the cooling system after fitting a new radiator?
Yes — absolutely. Trapped air will cause overheating, erratic temperature gauge behaviour and poor heater performance. Open any bleed screws fitted to the top hose or thermostat housing, run the engine to full temperature with the heater on hot, and top up as the level drops. Squeezing the top hose helps dislodge air pockets. Recheck the level once cold.
Can I use any aftermarket radiator or does it have to be a genuine Citroen part?
Quality aftermarket radiators from reputable brands such as Nissens, Valeo or Behr are perfectly acceptable and often identical to the original supplier's parts. What matters more is matching the radiator to your exact variant — engine, year, and whether the van has air conditioning or an automatic gearbox. Always quote your VIN when ordering to avoid fitment issues.