How to Remove the EGR Valve on a Peugeot Expert 2.0 HDi: Step-by-Step Guide
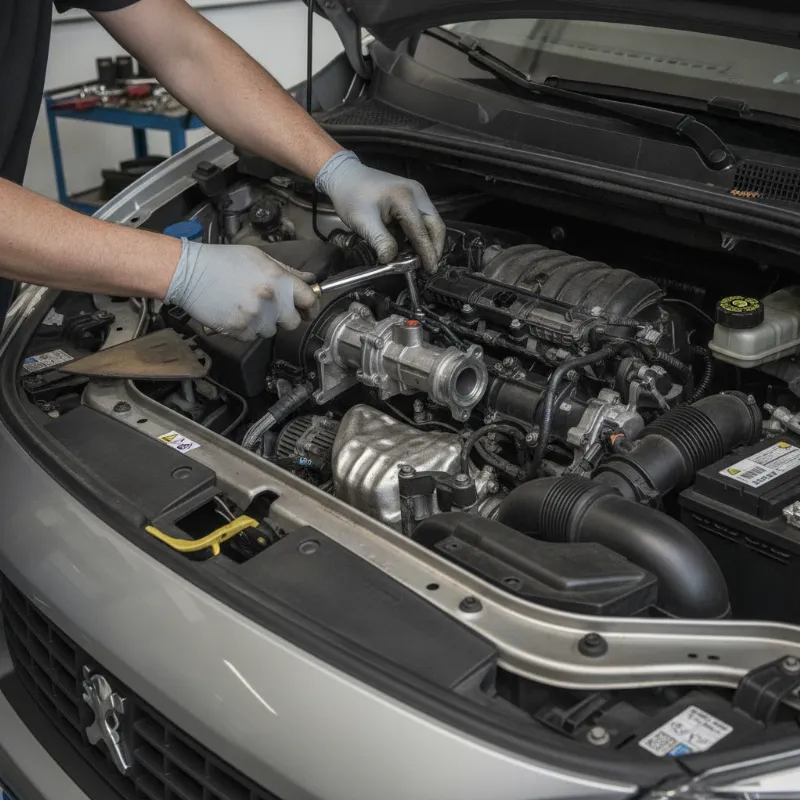
What the EGR Valve Does on the Peugeot Expert 2.0 HDi
The Exhaust Gas Recirculation (EGR) valve on the Peugeot Expert 2.0 HDi plays a key role in reducing harmful nitrogen oxide (NOx) emissions. It works by redirecting a small portion of the exhaust gases back into the intake manifold, where they are burned again alongside the fresh air-fuel mixture. This lowers combustion temperatures and, in turn, cuts down on the pollutants leaving the tailpipe.
On the 2.0 HDi engine — a workhorse fitted to countless UK vans — the EGR valve is electronically controlled and sits between the exhaust manifold and the intake side. Because it constantly deals with hot, sooty exhaust gases, it's prone to carbon build-up over time. When that happens, the valve can stick open or closed, triggering rough running, warning lights and loss of power. That's why so many Expert owners eventually find themselves needing to remove, clean or replace it.
Signs Your Peugeot Expert EGR Valve Needs Removing or Cleaning
There are several tell-tale symptoms that suggest the EGR valve on your Expert 2.0 HDi is struggling. The most common is the engine management light appearing on the dashboard, often accompanied by a fault code relating to EGR position or flow. You might also notice the van going into limp mode, particularly when accelerating hard or climbing hills with a load onboard.
Other signs include rough idling, a noticeable loss of power, black smoke from the exhaust, poor fuel economy and a hesitation when pulling away. Some drivers also report a slight rattling or ticking noise from the top of the engine as the valve motor struggles against carbon deposits. If you're seeing two or more of these symptoms together, it's a strong indicator that the EGR valve needs attention.
Tools and Parts You'll Need Before You Start
Before diving in, gather everything you need so you're not scrabbling around halfway through the job. You'll want a basic socket set (8mm, 10mm and 13mm are the most useful sizes for this engine), a set of Torx bits, a decent extension bar, a flat-blade screwdriver and a pair of long-nose pliers for the spring clips on the coolant hoses.
You'll also need a can of EGR or carburettor cleaner, a stiff nylon brush (an old toothbrush works well for tight spots), clean rags, a bowl to catch any coolant drips, and disposable gloves. It's worth having a new EGR valve gasket on hand, as the old one rarely comes off in a reusable condition. If you're replacing rather than cleaning, source a genuine or reputable aftermarket EGR valve for the 2.0 HDi — cheap unbranded units are a false economy.
Step-by-Step: How to Remove the EGR Valve on a Peugeot Expert 2.0 HDi
With your tools laid out and the van parked on a level surface with the engine fully cold, you're ready to begin. Take your time — rushing this job is how you end up snapping a plastic connector or rounding off a bolt. Allow yourself around two hours if it's your first time.
Step 1: Disconnect the Battery and Access the Engine Bay
Start by opening the bonnet and disconnecting the negative terminal of the battery using a 10mm spanner. This prevents any electrical shorts while you're unplugging sensors and also allows the ECU to reset once the job is complete. Next, remove the plastic engine cover — it usually pulls straight up off its rubber mounts. Take off the airbox lid or the whole airbox if access is tight, as this gives you much better visibility of the top of the engine.
Step 2: Locate the EGR Valve on the 2.0 HDi Engine
On the Peugeot Expert 2.0 HDi, the EGR valve is mounted towards the rear of the engine, typically bolted to the intake manifold with a metal pipe running down to the exhaust side. It's a compact black or silver unit with an electrical connector on top and usually a couple of small coolant hoses attached. Follow the metal EGR pipe up from the exhaust manifold and you'll find the valve at the top. Give it a quick clean with a rag before disassembly so you can see what you're working with.
Step 3: Remove Hoses, Electrical Connectors and Mounting Bolts
Carefully unclip the electrical connector on top of the valve — most have a small tab you press in before pulling. Next, use pliers to slide back the spring clips on the coolant hoses and gently work them off the valve stubs. Have your rag and bowl ready to catch drips. Now undo the bolts securing the EGR valve to the intake manifold and the flange bolts on the metal EGR pipe. These can be seized, so a little penetrating oil applied ten minutes beforehand really helps. Lift the valve out slowly, taking care not to drop any of the old gasket material into the intake.
Step 4: Clean or Replace and Refit the Valve
If you're cleaning, spray EGR cleaner generously into the valve and scrub away the carbon build-up with your brush. Avoid getting cleaner into the electric motor housing — focus on the valve body and the internal passages. Repeat until the metal shines through. If you're replacing, simply compare the new unit to the old one and set the old aside. Fit a new gasket, refit the valve and pipe in reverse order, torque the bolts up snugly (but not gorilla-tight), reconnect the coolant hoses and electrical plug, refit the airbox and engine cover, and finally reconnect the battery. Start the engine and let it idle while you check for leaks.
Common Problems After EGR Removal (and How to Avoid Them)
One of the most frequent issues owners run into is a persistent engine management light after refitting. This is often down to a loose electrical connector or a fault code that simply needs clearing with a diagnostic tool. Another common problem is a coolant leak from the small hoses on the valve — always fit new spring clips or jubilee clips if the originals look tired.
Some drivers are tempted to "blank" the EGR valve entirely using a metal blanking plate. Be aware that on a modern 2.0 HDi, blanking without remapping the ECU will almost certainly throw a fault code and could cause the van to enter limp mode. It may also affect your MOT emissions test and, depending on interpretation, the legality of the vehicle on the road. If in doubt, clean and refit rather than blank.
When to Get a Professional Involved
DIY EGR removal on the Expert 2.0 HDi is well within the ability of a competent home mechanic, but there are moments when a professional is the smarter call. If the mounting bolts are heavily corroded and you're worried about snapping one off in the manifold, a garage with proper heat and extraction tools will save you a much bigger headache. Likewise, if the fault codes persist after cleaning and you don't have access to a diagnostic reader, an independent Peugeot specialist can pinpoint whether it's the valve, a wiring issue or something further upstream like a blocked DPF.
Older, high-mileage 2.0 HDi engines often have multiple related issues — turbo actuators, swirl flaps and DPFs all interact with the EGR system. A specialist can look at the bigger picture rather than chasing one component at a time.
Thinking of Upgrading? Newer Peugeot Expert Vans for Sale
If you're finding yourself under the bonnet more often than behind the wheel, it might be time to consider a newer van. Modern Peugeot Expert models come with cleaner, more refined engines, better fuel economy and far fewer of the EGR-related headaches associated with the older 2.0 HDi. There's also the option of the fully electric e-Expert if your mileage suits it, which does away with the EGR system altogether.
Upgrading can often work out cheaper in the long run once you factor in repair bills, downtime and the lost earnings that come with a van off the road. Have a look through our current stock of used and nearly new Peugeot Expert vans to see what's available at your budget — and if you have questions about part-exchange, finance or specification, our team is always happy to help.
FAQs
How do you remove the EGR valve on a Peugeot Expert 2.0 HDi?
Disconnect the battery, remove the engine cover and airbox for access, then locate the EGR valve on the intake manifold at the rear of the engine. Unplug the electrical connector, slide off the coolant hose clips, and undo the mounting bolts on both the valve and the EGR pipe flange. Lift the valve out carefully, clean or replace it, then refit with a new gasket in reverse order. Reconnect the battery and check for leaks on startup. Allow around two hours for the job.
How long does it take to clean or replace the EGR valve on a Peugeot Expert 2.0 HDi?
For a competent DIY mechanic, expect around 1.5 to 2 hours for a clean and refit, or slightly less if you're simply swapping in a new valve. Seized bolts or corroded pipework can add time, so allow extra if the van is high mileage or has spent a lot of its life on salted winter roads.
Can you drive a Peugeot Expert with a faulty EGR valve?
You can usually drive short distances with a faulty EGR valve, but it isn't recommended. A stuck valve can cause limp mode, poor fuel economy, black smoke and eventually damage related components such as the DPF or turbo. If the engine management light is on and performance is affected, it's best to address the issue promptly rather than let it develop into a bigger repair.
Is it legal to blank the EGR valve on a Peugeot Expert 2.0 HDi in the UK?
Blanking the EGR valve can affect your van's emissions performance and may cause it to fail an MOT emissions test. Tampering with emissions equipment is also generally considered non-compliant with UK regulations. Cleaning or replacing the valve is the safer route both legally and mechanically, especially if the van is used commercially.
How much does a new EGR valve for a Peugeot Expert 2.0 HDi cost?
Prices vary depending on brand and supplier, but a quality aftermarket EGR valve typically falls in the mid-range for common van parts, with genuine Peugeot units costing more. Factor in a new gasket and, if you're not fitting it yourself, around an hour of labour at your local garage's rate.