How to Replace the Starter Motor on a Vauxhall Combo Van: A Step-by-Step Guide
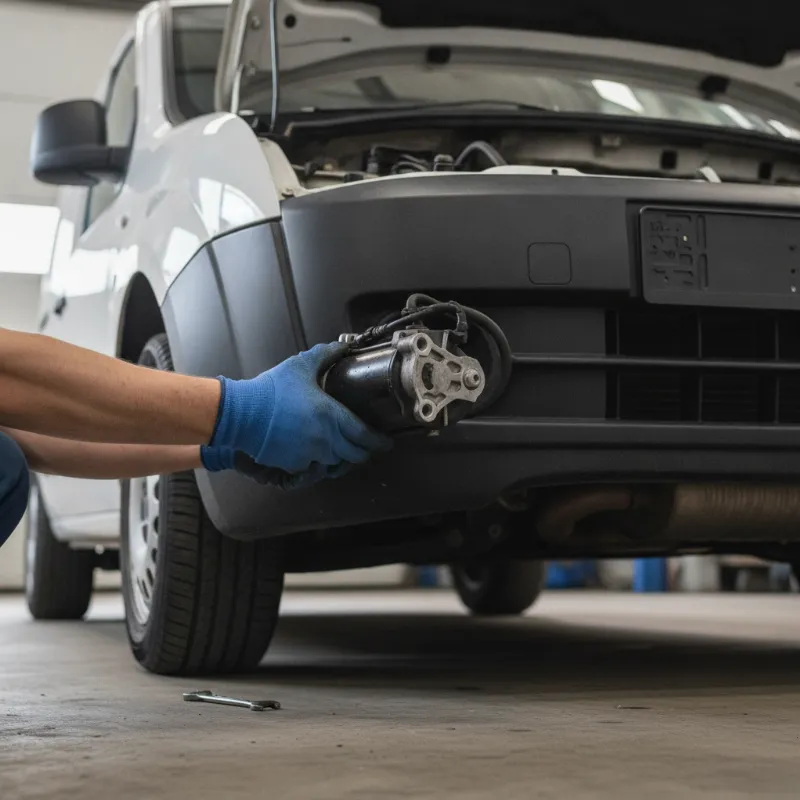
Signs your Vauxhall Combo starter motor is failing
The starter motor is one of those components you never really think about — until the morning it lets you down. On the Vauxhall Combo, a failing starter tends to give plenty of warning before it packs in completely, so learning to spot the symptoms early can save you a roadside recovery bill and a lost day's work.
The most common giveaway is a slow, laboured crank when you turn the key or press the start button. If the engine sounds like it's struggling to spin over even though the battery is fully charged and the terminals are clean, the starter motor itself is a likely culprit. A single loud click from under the bonnet, followed by silence, usually points to a stuck solenoid — the electrical switch inside the starter that engages the motor. Intermittent starting, where the van fires up first time one morning and refuses the next, is another classic symptom.
You might also hear a high-pitched whirring or grinding noise as the engine turns over. That's often the starter's pinion gear failing to properly mesh with the flywheel ring gear, and it's a sign the internal components are wearing out. Smoke or a burning smell from the starter area is more serious and means you should stop trying to crank the engine before you damage the wiring loom.
Before condemning the starter, always rule out the simpler causes first. A tired battery, corroded earth strap, or a loose positive lead can all mimic starter failure. Test the battery voltage, check the terminals are tight and clean, and inspect the main earth cable where it bolts to the chassis. If everything else checks out and the symptoms remain, the starter motor is the next suspect.
Tools and parts you'll need
Replacing the starter motor on a Vauxhall Combo isn't a job that demands a workshop full of specialist kit, but having the right tools laid out before you begin will make the difference between a straightforward hour's work and a frustrating afternoon. Most Combo owners with reasonable DIY experience can tackle this job on the driveway with hand tools alone.
You'll want a socket set covering 8mm through 19mm, ideally with both short and long extensions, along with a good ratchet and a breaker bar for the stubborn mounting bolts. A set of combination spanners in the same sizes is useful for the electrical terminals, and a Torx bit set may be needed depending on your Combo's model year and engine variant. Have a torque wrench ready for refitting — the mounting bolts need to go back to the correct spec to prevent the starter working loose.
You'll also need a trolley jack and a pair of axle stands rated for the Combo's weight, wheel chocks, a decent inspection lamp or head torch, penetrating oil for any seized fasteners, and a wire brush to clean up terminals and mounting faces. A multimeter is invaluable for confirming the diagnosis before you commit to replacing the part.
For parts, source a starter motor that matches your exact engine code — the Combo has been offered with a wide range of petrol and diesel powerplants over the years, and the wrong unit simply won't fit. Take a note of the number stamped on the old starter or quote your registration to the parts supplier. A quality reconditioned unit from a reputable supplier will usually come with a warranty and can be a sensible middle ground between a cheap aftermarket part and a full-price genuine Vauxhall item.
Safety checks before you start
Before you touch a single bolt, take five minutes to make the job safe. Park the van on level ground, apply the handbrake firmly, chock the rear wheels, and put the gearbox in neutral. Let the engine cool completely — the starter sits close to the exhaust manifold and downpipe, and both will burn you badly if the van has been running recently.
Disconnect the negative battery terminal before doing anything electrical. The main feed cable to the starter is live directly from the battery at all times, and shorting it against the chassis will cause a spectacular arc, potentially damaging the wiring, the battery, or you. If you're jacking the van up to reach the starter from underneath, always support it on properly rated axle stands — never rely on a jack alone. Wear safety glasses and gloves, especially when working under the vehicle where dislodged dirt and rust flakes will inevitably fall towards your face.
How to replace the starter motor on a Vauxhall Combo van, step by step
With diagnosis confirmed, tools laid out, and the van safely prepared, the actual replacement follows a logical sequence. The exact routing of cables and the position of the starter varies slightly between Combo generations and engine options, but the underlying process is the same across the range. Work methodically, photograph anything you're unsure about before you disturb it, and keep the fasteners in labelled containers so you know what goes back where.
Disconnecting the battery and accessing the starter
Start by opening the bonnet and disconnecting the negative terminal from the battery, tucking the cable well out of the way so it can't spring back and make contact. On most Combo variants the starter motor is mounted on the lower rear face of the engine, bolted to the bell housing where the gearbox meets the block. Access is usually best from underneath, though on some petrol models you can reach the top mounting bolt from the engine bay by removing the airbox or intake ducting.
Chock the rear wheels, jack the front of the van up, and lower it onto axle stands. Remove the engine undertray if fitted — this is typically held on with a mix of plastic clips and 10mm bolts. Once the undertray is out of the way, look up towards the join between the engine and gearbox and you should see the cylindrical body of the starter motor with two heavy cables running to it.
Removing the old starter motor
Take a photograph of the wiring before you disconnect anything. There's a thick main positive cable secured with a nut on a threaded post, and a smaller trigger wire clipped onto a spade terminal — this is the signal from the ignition switch that tells the solenoid to engage. Undo the nut on the main cable, slide the eyelet off the stud, and pull the smaller wire off its spade connector.
The starter is held to the bell housing by two or three bolts, depending on the variant. Crack them loose with a breaker bar first, then wind them out with a ratchet, supporting the weight of the starter with your free hand as you remove the final bolt. These units are heavier than they look — expect around three to four kilograms — so be ready for it to drop. Ease the starter out of its locating hole, taking care not to snag the wiring loom on the way.
Before fitting the new unit, take a moment to clean up the mating surface on the bell housing with a wire brush. A clean, corrosion-free contact face ensures a solid earth path back to the engine block, which the starter relies on to function properly. Compare the new starter with the old one side by side: check the body length, the position of the mounting holes, the pinion gear tooth count, and the location of the electrical terminals. Any difference means the wrong part has been supplied and it needs to go back before you get any further.
Fitting and testing the new starter motor
Offer the new starter up to its locating hole, making sure the pinion sits correctly through the aperture in the bell housing. Start the mounting bolts by hand to avoid cross-threading, then tighten them progressively in a criss-cross pattern before torquing them to the manufacturer's specification — typically in the region of 40 to 50 Nm, but check your workshop data for the exact figure.
Reconnect the small trigger wire to its spade terminal, then fit the main positive cable back onto the threaded post and tighten the nut firmly. A loose main terminal is a common cause of starter failure shortly after replacement, so make sure it's properly torqued. Refit the engine undertray, lower the van back to the ground, and reconnect the negative battery terminal.
With everything back together, get in and turn the key. The engine should spin over crisply and fire almost immediately. Let it idle for a couple of minutes while you check underneath for any signs of movement, unusual noise, or loose cables. Take the van for a short drive, then stop and restart the engine two or three times to confirm the new starter is working reliably before you consider the job finished.
Common problems and troubleshooting after fitting
Occasionally the van still won't start after a fresh starter has gone in, and it's worth knowing the usual suspects before you assume the new part is faulty. The most common issue is a loose or dirty main earth connection between the engine and chassis — the starter draws several hundred amps in the moment it engages, and any resistance in the earth path will leave you with a click and no crank. Check the earth strap where it bolts to the block and where it terminates on the bodywork.
If the starter spins but doesn't turn the engine, the pinion isn't engaging with the flywheel — usually because the unit hasn't seated fully in the bell housing. Loosen the mounting bolts, reseat the starter, and retighten. A whirring noise after the engine has fired means the pinion isn't retracting, which points to a faulty solenoid on the new unit or a wiring fault holding the trigger circuit live.
Warning lights on the dashboard after the job is complete are usually nothing to worry about and will typically clear themselves after a few successful start cycles as the ECU relearns. If they persist, a plug-in code reader will tell you what's stored and whether it's related to the work you've done.
When to leave it to a professional
DIY has its limits, and there's no shame in handing the job over if the circumstances aren't right. If your Combo is still under warranty, doing the work yourself may invalidate the cover on related components, so it's worth checking your paperwork first. Later Combo models with more integrated electronics — particularly those with stop-start systems — sometimes require the ECU to be reprogrammed after a starter change, which needs dealer-level diagnostic equipment.
You should also think twice if you don't have somewhere safe to work. A busy roadside, a sloping driveway, or a lack of proper axle stands are all good reasons to book the van in with a garage instead. And if diagnosis has been inconclusive — for example, if you're not sure whether the fault is the starter, the immobiliser, or the wiring loom — paying a professional an hour's labour to pin down the cause is far cheaper than fitting parts on guesswork.
A good independent van specialist will typically complete a Combo starter replacement inside a couple of hours, and they'll warranty both the part and the labour. For a working van that pays its way every day, that peace of mind is often the more sensible route.
Thinking of upgrading? Explore our Vauxhall Combo Cargo range
If your Combo has reached the age where starter motors, clutches, and other consumables are becoming a regular event, it may be worth weighing the cost of ongoing repairs against the appeal of a newer van. The current Vauxhall Combo Cargo has moved on considerably from earlier generations, with more efficient engines, better payload figures, improved cab technology, and the option of a fully electric drivetrain for operators looking to cut running costs and access low-emission zones without penalty.
Our stock of new and used Combo Cargo vans covers a range of trim levels, wheelbases, and specifications to suit everything from sole-trader courier work to multi-drop trades and fleet operators. If you'd like to compare finance options against the ongoing repair bills on your current van, our team can talk you through the numbers with no obligation. Get in touch to arrange a viewing or a test drive — sometimes the most cost-effective repair is the one you don't have to make.
FAQs
How do you replace the starter motor on a Vauxhall Combo van, step by step?
Disconnect the negative battery terminal, jack the front of the van up and support it on axle stands, then remove the engine undertray to access the starter on the lower rear of the engine. Photograph and disconnect the main positive cable and the smaller trigger wire, undo the two or three mounting bolts holding the starter to the bell housing, and lower the old unit out. Clean the mating surface, offer the new starter into position, torque the mounting bolts to spec (typically 40–50 Nm), reconnect the wiring, refit the undertray, reconnect the battery, and test the engine starts cleanly before taking the van for a short road test.
How long does it take to replace a starter motor on a Vauxhall Combo?
For a competent DIYer with the right tools, budget around one to two hours on the driveway. A professional garage will usually quote between one and two hours of labour, though older vans with seized bolts or corroded fasteners can take longer.
How much does a new starter motor for a Vauxhall Combo cost?
Prices vary by engine variant and supplier, but a good-quality reconditioned unit is typically the most cost-effective option, with new aftermarket parts sitting slightly higher and genuine Vauxhall units at the top end. Always match the part to your exact engine code rather than shopping on registration alone, as the Combo has been offered with a wide range of powertrains.
Can you drive a Vauxhall Combo with a failing starter motor?
You can drive it if it starts, but you shouldn't rely on it. A failing starter can leave you stranded without warning, and repeated failed cranking attempts can drain the battery and put strain on the wiring. Book it in for replacement as soon as you notice slow cranking, clicking, or intermittent starting.
Do I need to reprogram anything after fitting a new starter motor?
On most Combo generations no coding is required — the starter is a straightforward mechanical and electrical swap. Some later models with stop-start systems may throw a fault code that clears after a few successful start cycles, but if warning lights persist, a diagnostic scan will confirm whether any reprogramming is needed.