How to Change the Indicator Lens on a VW Crafter: Step-by-Step Guide
Why the indicator lens on a VW Crafter needs replacing
The indicator lenses on a VW Crafter take a fair bit of punishment over the life of the van. Whether it's a low-speed knock in a tight loading bay, a stray branch on a rural delivery run, or simply years of UV exposure clouding the plastic, a damaged or faded lens is something most Crafter owners will deal with sooner or later. A cracked lens lets moisture into the housing, which can corrode the bulb holder and cause intermittent flashing — and a hazy, yellowed lens dims the light output enough to attract MOT advisories.
Beyond the cosmetics, a working indicator is a legal requirement. If the lens is broken to the point where white light is showing to the rear or the colour is no longer clearly amber, you're looking at an MOT failure and a potential fixed penalty if a police officer spots it. The good news is that changing the lens on a Crafter is one of the more straightforward DIY jobs on the van — you don't need specialist tools, and a competent home mechanic can have it done in under half an hour.
Tools and parts you'll need
You won't need a workshop full of kit for this job. A basic toolkit is more than enough. Gather the following before you start: a Torx screwdriver set (usually T20 and T25 cover Crafter trim fixings), a small flat-blade screwdriver for gently prising trim clips, a Phillips screwdriver, a pair of trim removal tools if you have them (a plastic paint scraper works in a pinch), a clean microfibre cloth, and a torch. It's also worth having a small container to hand to keep the screws safe — they're easy to lose in the engine bay or wheel arch.
You'll obviously need the replacement lens itself, and depending on your Crafter's age you may find the lens is only supplied as a complete indicator unit rather than a separate cover. Check before you order. It's also sensible to buy a fresh bulb at the same time — if the old lens has been leaking, the bulb contacts will likely be tarnished, and swapping it while you're in there saves a second job later.
Choosing the correct replacement lens for your VW Crafter
The VW Crafter has been through several generations, and the indicator arrangement has changed across each. The original 2006–2016 Crafter shares much of its front-end design with the Mercedes Sprinter of the same era, while the second-generation 2017-onwards Crafter is a ground-up VW design with different lenses front, side and rear. Always cross-reference by your registration plate or the VIN before ordering — a lens for a 2015 van will not fit a 2019 model, even though both are "Crafters".
You'll also want to decide between a genuine VW part and an aftermarket equivalent. Genuine lenses tend to offer better colour matching and UV stability, while quality aftermarket options can save you a considerable amount if you're happy with a slightly shorter service life. Avoid the cheapest no-brand options — the plastic tends to yellow within a year, and the fitment is often just loose enough to let water in.
Step-by-step: how to change the indicator lens on a VW Crafter
Before you touch anything, park the van on level ground, switch off the ignition, and remove the key from the barrel. If you're working on the front indicator, it's worth disconnecting the negative terminal of the battery — you'll be poking around close to headlight wiring and it's cheap insurance against a short. Give yourself good light and, if you can, work in the dry. Wet trim clips are far more likely to snap.
Front indicator lens removal
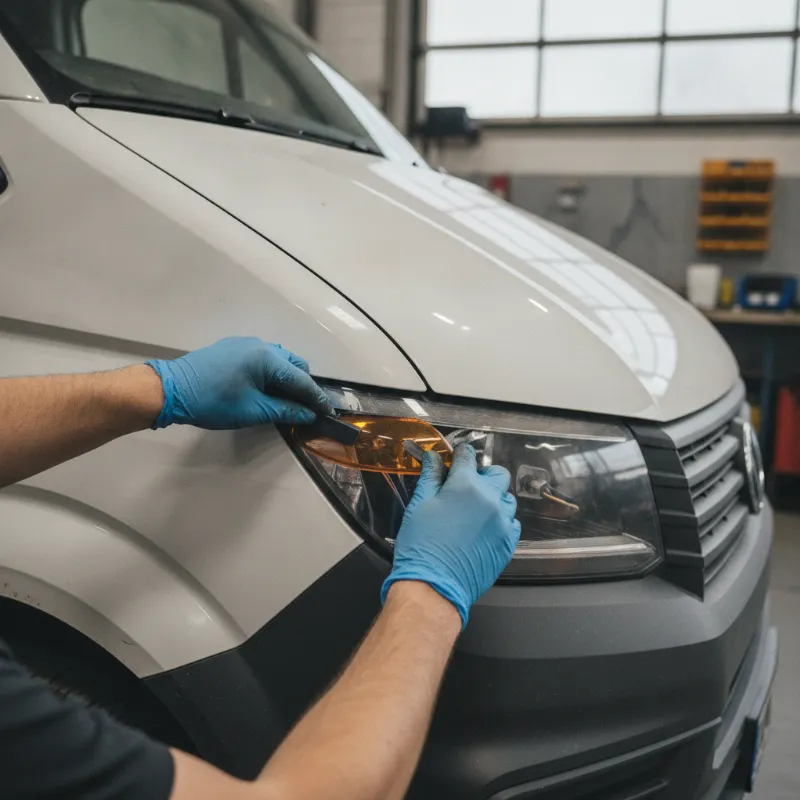
On most Crafter models the front indicator is integrated into the headlight unit, so "changing the lens" in practice means removing the headlamp assembly to access the bulb holder and, on some variants, releasing a separate indicator module. Open the bonnet and locate the two or three Torx screws along the top edge of the headlight — usually T25. Undo them and set them aside. Some models also have a retaining clip behind the wheel arch liner; if the headlamp doesn't ease forward with gentle pressure, check there before pulling harder.
Once the headlight is free, tilt it forward carefully and disconnect the multi-plug from the rear. You'll now be able to twist the amber bulb holder anti-clockwise to release it, and depending on the version of your Crafter you can then either swap the lens section directly or fit a complete replacement unit. Take care not to touch the reflector inside — fingerprints on the mirror surface will show up when the lights are on.
Side repeater indicator lens removal
The side repeater on the front wing is one of the easier lenses to replace. On the first-generation Crafter it's a small oval unit set into the wing panel; on the second-generation model it's usually built into the wing mirror housing. For the wing-mounted type, press the lens firmly towards the front of the van — there's a sprung metal clip inside that will release, allowing the rear of the lens to pop outwards. Pull it clear, twist the bulb holder to release it, and unclip the wiring.
For mirror-mounted repeaters, you'll usually need to remove the mirror glass first to access the retaining screws behind. Tilt the mirror glass fully inward at the top, then get a plastic trim tool behind the outer edge and lever gently — the glass is held on ball clips and will pop free. From there, the indicator lens is held by two small screws.
Fitting the new lens and testing
Fitting is the reverse of removal, but take your time on a couple of key points. First, make sure any rubber gasket or seal is seated cleanly all the way around — this is what keeps water out of the housing, and a pinched seal will let moisture in within weeks. Second, don't overtighten the Torx screws on a headlight assembly; the plastic mounts strip easily. Snug is enough.
Before you close the bonnet or refit any trim panels, reconnect the battery if you disconnected it, switch on the ignition and test the indicator on both sides, then test the hazard warning lights. Walk around the van and check the flash rate looks normal — if it's flashing faster than usual, the new bulb hasn't seated properly or is the wrong wattage. Finish by giving the new lens a wipe with the microfibre cloth to remove any fingerprints.
Common mistakes to avoid
The single most common mistake on this job is forcing a trim clip that hasn't fully released. Crafter indicator lenses use sprung metal clips or plastic tabs that require a specific direction of pressure — if it feels like you're fighting the part, stop and re-read the section above. A snapped clip usually means the lens won't sit flush afterwards, which lets water in and defeats the whole repair.
The second mistake is fitting the wrong bulb. The Crafter uses PY21W amber bulbs on most indicator positions, not the clear P21W used on brake and reverse lights. Fitting a clear bulb behind an amber lens will still give you an amber light, but it'll be dimmer and the bulb rating won't match — leading to hyper-flash on some models. Third, avoid using silicone sealant around the edge of a new lens "just to be sure" — if the seal isn't working on its own, the lens isn't seated properly, and silicone will only trap moisture inside.
When to call in a professional
If your Crafter is fitted with LED indicators from the factory, or if the wiring loom behind the headlight shows any sign of melting or chafing, it's worth handing the job over to a workshop. LED units often need coding into the van's body control module after replacement, and damaged wiring is a fire risk that goes well beyond a simple lens swap. Similarly, if the mounting points on the headlight or wing have cracked — a common outcome of a previous cheap repair — you'll need bodywork attention rather than just a new lens.
Any franchised VW commercial dealer or an experienced independent van specialist will be able to quote for the work, and it's usually a modest labour charge. If you're not confident with electrics, or if the van is still under warranty, letting a professional handle it protects both you and the paperwork.
Keeping your VW Crafter road-ready
A working indicator is one of those small things that separates a well-kept working van from a tired one, and it's the kind of walk-around check that's worth doing every week — especially before a long motorway run or an MOT. Give each corner of the van a quick visual once-over: lens condition, colour, and a quick flash to make sure everything's still working. Catching a hairline crack early, before water gets in, can turn a full lens replacement into a simple sealant repair.
Combine that with regular checks on tyres, wipers, washer fluid and screen condition, and you'll head off most of the small MOT advisories that turn into bigger bills. The Crafter is a hard-working, long-lasting van when it's looked after — and jobs like changing an indicator lens are exactly the kind of easy home maintenance that keeps it earning its keep.
FAQs
How do you remove and replace the indicator lens on a VW Crafter?
For the front indicator, open the bonnet, undo the Torx screws along the top of the headlight assembly, ease the unit forward and disconnect the wiring plug, then either swap the lens section or fit a complete replacement unit. For side repeaters, press the lens firmly towards the front of the van to release the internal spring clip, pull it clear and twist out the bulb holder. Refit in reverse, making sure any rubber seal is seated cleanly, then test both indicators and the hazard lights before closing everything up.
How long does it take to change an indicator lens on a VW Crafter?
For a competent DIYer, a side repeater lens takes around 10–15 minutes and a front indicator lens or headlight-integrated unit takes around 30–45 minutes. Allow a little longer the first time you tackle the job, and add time if you're also swapping the bulb or cleaning corrosion from the holder.
Will a broken indicator lens fail the MOT?
Yes. If the lens is cracked to the point where white light shows through, or the amber colour is no longer clearly visible, it's an automatic MOT failure. A heavily faded or hazy lens that dims the light output significantly will usually attract at least an advisory, so it's worth addressing before the test.
Do I need to code a new indicator to the VW Crafter?
Standard bulb-type indicator lenses don't require any coding — fit the part, test the flash rate, and you're done. However, if your Crafter is fitted with factory LED indicator units, replacement modules may need to be registered to the body control module using VW's diagnostic software, which is a job for a dealer or specialist.
Can I use an aftermarket indicator lens on my VW Crafter?
Yes, quality aftermarket lenses from established brands are perfectly acceptable and can save a fair amount over genuine VW parts. Just make sure the part is specified for your exact model year and check reviews before buying — very cheap unbranded lenses tend to yellow quickly and often fit loosely, which lets water into the housing.