How to Replace the Gear Stick on a Citroen Dispatch: Step-by-Step Guide
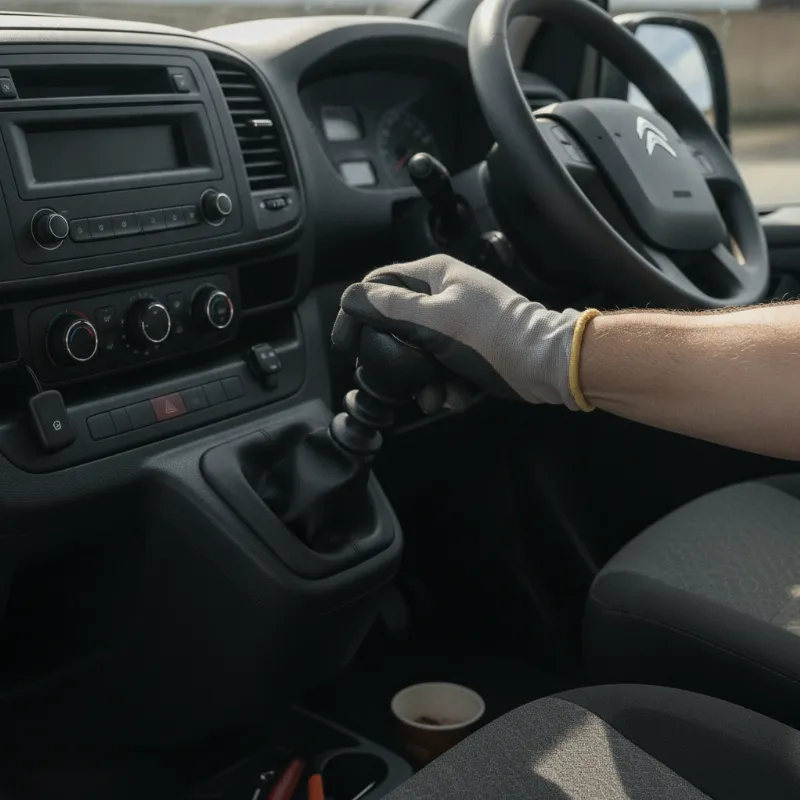
When Does a Citroen Dispatch Gear Stick Need Replacing?
The gear stick on a Citroen Dispatch is one of those components that quietly does its job for years — until it doesn't. Because the Dispatch is a working van, often clocking up serious mileage on delivery routes and trade jobs, the gear selector and its linkage take a fair beating. Sloppy shifts, vague gear engagement or a stick that feels like it's swimming in porridge are all early warning signs that something needs attention.
Before you order parts, it's worth understanding whether the problem really is the gear stick itself, or whether the underlying linkage, bushes or cables are actually to blame. Getting this diagnosis right saves you time, money and the frustration of stripping the cab twice.
Common Symptoms of a Failing Gear Stick
The most common complaint from Dispatch owners is a gear stick that feels loose or wobbly in neutral, with excessive side-to-side play. You might also notice difficulty selecting reverse, a notchy feel when shifting into first or second, or the lever popping out of gear under load. In some cases the stick can feel unusually stiff, especially first thing in the morning, which often points to worn bushes at the base of the lever rather than a fault deeper in the gearbox.
Other tell-tale signs include a rattling noise from the centre console area when driving over rough surfaces, or the gear knob sitting at an odd angle even when the van is in neutral. If your Dispatch has covered a high mileage — and many do — these symptoms tend to creep in gradually rather than appearing overnight.
Gear Linkage vs Gear Stick: Knowing the Difference
It's easy to blame the gear stick when the real culprit is actually the linkage. The gear stick is the lever you hold, along with its pivot housing inside the cab. The linkage is the system of cables (or on some variants, rods) that transmits your movements from the stick down to the gearbox selector shafts. On the Citroen Dispatch, worn cable end bushes and stretched linkage cables are extremely common, and they produce very similar symptoms to a worn stick.
A quick test: with the engine off, wiggle the gear stick from side to side in neutral. If the movement feels excessive at the top but the base of the lever is solid, the internal bushes in the stick assembly are worn. If the whole assembly moves as one unit with slack that only shows up when you actually select a gear, the linkage cables or their end bushes are more likely to be at fault. Many owners end up replacing both at the same time for a proper fix.
Tools and Parts You'll Need
Replacing the gear stick on a Dispatch is a job most competent DIYers can tackle in an afternoon, provided you have the right kit. You'll need a basic socket set (8mm, 10mm and 13mm sockets cover most of it), a set of trim removal tools to lift the centre console without cracking the plastics, a flat-blade screwdriver, and a torch — the footwell gets dark once the console is out. A pair of long-nose pliers is useful for popping cable clips off the ball joints.
For parts, order a genuine or good-quality aftermarket gear stick assembly specifically for your Dispatch model and year, as there are variations between the pre-2007 and post-2007 vans, and again for the current generation shared with the Peugeot Expert and Vauxhall Vivaro. It's sensible to buy new cable end bushes at the same time, because if the originals have been on for years they'll almost certainly break when you remove them. A small tub of white lithium grease will help everything move smoothly on reassembly.
Step-by-Step: How to Replace the Gear Stick on a Citroen Dispatch
Before you start, park on level ground, apply the handbrake firmly and chock the wheels. Disconnect the negative terminal on the battery if you want to be cautious around any wiring that runs through the console. Give yourself plenty of light and lay out a clean cloth to catch small clips and screws — they have a habit of vanishing into the cab carpet.
Step 1: Access the Gear Stick Housing
Start by unscrewing the gear knob — most Dispatch knobs simply twist off anti-clockwise, though some later versions have a small retaining clip under the gaiter. Next, carefully lift the gear stick gaiter and surround trim. Use a plastic trim tool rather than a screwdriver to avoid scratching the dashboard. Once the surround is free, you'll usually find a couple of screws or clips holding the centre console panel in place. Remove these and lift the panel out to expose the gear stick base assembly bolted to the floor.
Step 2: Disconnect the Linkage Cables
With the housing exposed, you'll see two cables running from the base of the gear stick assembly down through the bulkhead — one for gear selection (side-to-side) and one for gear engagement (fore and aft). Each cable ends in a small plastic ball socket that clips onto a ball stud on the lever mechanism. Use a flat screwdriver or a proper cable clip tool to gently prise these sockets off — they'll pop free with a satisfying click. Take note of which cable goes where; a quick photo on your phone at this stage is worth its weight in gold when reassembling.
You'll also need to release the outer cable retaining clips from the mounting bracket. These are typically U-shaped metal clips that pull out sideways, allowing the cable ends to lift clear of the bracket.
Step 3: Remove the Old Gear Stick Assembly
The gear stick housing is usually secured to the floor with three or four bolts (10mm or 13mm depending on year). Undo these evenly, supporting the assembly as you take the last bolt out. Lift the whole assembly clear of the cab. Take a moment to inspect the old unit — you'll often see the plastic bushes at the pivot point are cracked, worn oval or missing altogether, which confirms why the shifts had become vague. Give the mounting area on the floor a quick clean before fitting the new part.
Step 4: Fit and Align the New Gear Stick
Offer up the new gear stick assembly and lower it onto the mounting studs or holes on the floor. Start all the bolts by hand before tightening any of them, so the housing sits square. Nip them up evenly to a firm hand-tight, then give each a final quarter turn — you don't need to over-torque these, as the mounting points are pressed steel and can distort. Apply a smear of white lithium grease to the ball studs before clipping the linkage cables back on, making sure each cable goes back to the position you noted earlier. Refit the outer cable retaining clips and check that both cables are seated fully.
Step 5: Test the Gear Selection
Before you rebuild the console, sit in the driver's seat with the engine off and run through all the gears including reverse. Each gear should engage cleanly with a positive, well-defined feel. If any gear is hard to find or the stick doesn't return to a central neutral position, you may need to adjust the cable end fittings — most aftermarket cables have a small adjustment collar that lets you fine-tune the resting position. Once you're happy, start the engine and check gear selection with the clutch depressed. If everything shifts sweetly, refit the centre console, surround trim, gaiter and gear knob in the reverse order of removal.
When to Call in a Professional
If you've replaced the gear stick and the shift quality is still poor, the problem almost certainly lies further down the linkage or inside the gearbox itself. Worn selector shaft seals, damaged synchros or a failing clutch release mechanism can all mimic gear stick problems, and none of these are jobs to tackle on the driveway without proper equipment. A specialist van mechanic or a Citroen-familiar independent garage will be able to road test the van, inspect the gearbox mounts (a very common cause of vague shifts on older Dispatches) and diagnose whether a full gearbox rebuild is required.
It's also worth handing the job over if you don't feel confident removing interior trims, or if your Dispatch is still on any kind of warranty or service plan — DIY work in the wrong place can invalidate cover. For high-mileage vans that are used commercially, a couple of hours of garage labour is often cheaper than a day off the road because a botched repair has left the van undriveable.
Is It Worth Repairing or Time to Upgrade Your Citroen Dispatch?
A gear stick and linkage refresh on a Dispatch is a relatively cheap fix that can transform how the van feels to drive, and on a mechanically sound van it's absolutely worth doing. However, if the gear stick is just one of a growing list of niggles — tired clutch, worn suspension, high mileage, increasing MOT bills — it may be time to step back and weigh up whether continued repairs make sense against the value of the van.
For traders and fleet operators, downtime is money. If your Dispatch is spending more days off the road than on it, upgrading to a newer used van or a current-generation model can often work out cheaper over a year than the drip-drip cost of ongoing repairs. On the other hand, if the van is otherwise in good health, sorting the gear stick and enjoying another few years of reliable service is a sensible call. Either way, a proper diagnosis first — rather than throwing parts at the problem — is the key to spending your money wisely.
FAQs
How do you replace the gear stick on a Citroen Dispatch?
To replace the gear stick on a Citroen Dispatch, unscrew the gear knob, lift the gaiter and surround trim, and remove the centre console to access the gear stick housing. Disconnect the two linkage cables from their ball studs, release the outer cable clips, then unbolt the housing from the floor (typically three or four 10mm or 13mm bolts). Fit the new assembly, torque the bolts evenly, grease and reconnect the linkage cables, and test each gear with the engine off before refitting the trim. The job usually takes one to two hours with basic tools.
How long does it take to replace a Citroen Dispatch gear stick?
For a competent DIYer, budget between one and two hours from start to finish. A professional mechanic will usually complete the job in under an hour. Add extra time if you're also replacing the linkage cables or bushes at the same time, which many owners choose to do while everything is stripped down.
Can I drive my Citroen Dispatch with a worn gear stick?
You can drive short distances with a worn or wobbly gear stick, but it's not advisable to leave it for long. A very worn selector can eventually make it impossible to engage certain gears — particularly reverse — and could leave you stranded. There's also a risk of accidentally selecting the wrong gear under load, which can damage the gearbox. It's best to sort it as soon as symptoms appear.
Is the gear stick the same on all Citroen Dispatch models?
No — the design has changed across generations. Pre-2007 vans, the 2007-2016 generation shared with the Peugeot Expert and Fiat Scudo, and the current model shared with the Peugeot Expert and Vauxhall Vivaro all use different gear stick assemblies. Always check your registration and VIN when ordering parts to make sure you get the correct unit for your specific van.
Should I replace the gear linkage cables at the same time?
In most cases, yes. If the gear stick is worn enough to need replacing, the linkage cables and their end bushes are usually tired too, and they're a common source of vague shifting on the Dispatch. Since you'll already have the console apart, fitting new cables adds relatively little labour and gives you a properly refreshed gear change rather than a half-job.