How to Change the Brake Servo on a Peugeot Expert: Step-by-Step Guide
What the brake servo does on a Peugeot Expert
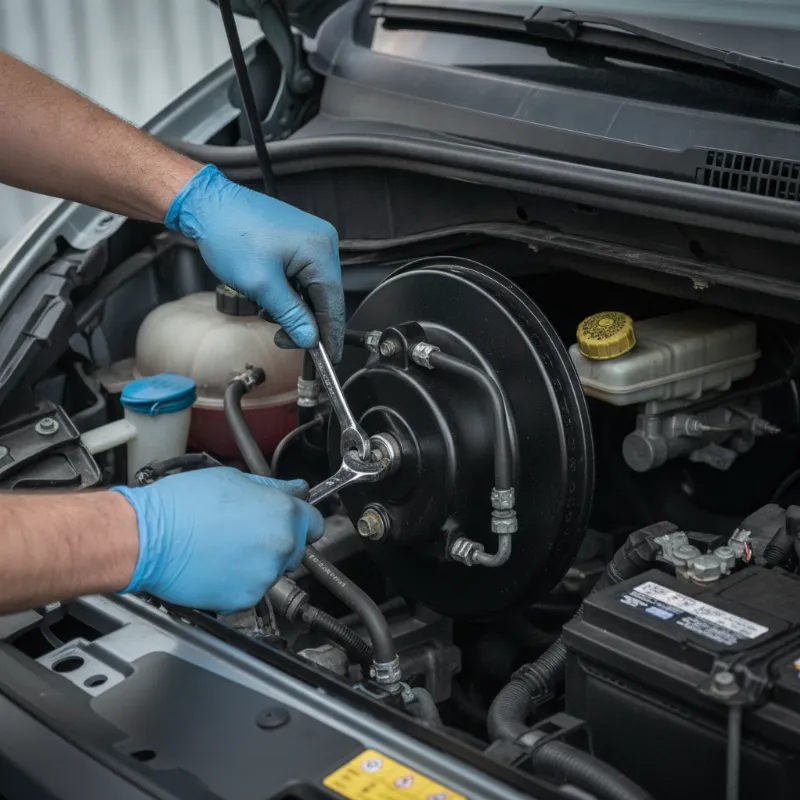
The brake servo, sometimes called the brake booster, is the round vacuum-powered unit bolted between your brake pedal and the master cylinder at the back of the engine bay. Its job is to multiply the force you apply through the pedal, using vacuum drawn from the engine (or a dedicated vacuum pump on diesel models) so that stopping a loaded Peugeot Expert doesn't require Herculean leg strength.
On the Expert, the servo is a safety-critical component. When it's working properly, pedal feel is firm but progressive, and even a fully laden van pulls up predictably. When it starts to fail, braking effort rises sharply and stopping distances grow — not something you want on a working vehicle carrying tools, stock, or passengers.
Signs your Peugeot Expert brake servo needs replacing
A failing servo rarely dies overnight. The most common early symptom is a stiff, wooden-feeling brake pedal that needs a lot more pressure than usual to slow the van. You may also notice a hissing sound from behind the dashboard when you press the pedal, which points to a torn internal diaphragm or a perished vacuum hose feeding the servo.
Other tell-tale signs on the Expert include the engine idle dipping or stalling when you brake, longer stopping distances, and sometimes a warning light on the dash if the vacuum sensor picks up a fault. If the pedal drops slowly to the floor under steady pressure, that's more likely a master cylinder issue — but the two are often replaced together as they sit back-to-back.
Tools and parts you'll need
Before you start, gather everything so you're not halfway through the job with the master cylinder off and no way to cap the brake lines. You'll need a replacement servo unit (make sure it matches your Expert's model year and engine — pre-facelift and post-facelift units differ), a new servo-to-bulkhead gasket, fresh DOT 4 brake fluid, and ideally a new vacuum hose and non-return valve if the originals look tired.
Tool-wise, you'll want a socket set with long extensions, a set of open-ended and flare-nut spanners (11mm and 13mm cover most brake union nuts on the Expert), a brake pipe clamp or line plugs, a pedal depressor or a helper for bleeding, a torque wrench, and a container to catch spilt brake fluid. Safety glasses and nitrile gloves are essential — brake fluid strips paint and irritates skin.
Step-by-step: how to change the brake servo on a Peugeot Expert
The job is mechanically straightforward but fiddly because the servo lives in a tight corner of the bulkhead. Allow yourself half a day, work methodically, and take photos as you go so reassembly is easier. Below is the sequence most independent workshops follow on the Expert.
Step 1: Disconnect the battery and depressurise the brakes
Park on level ground, chock the wheels, and disconnect the negative battery terminal. With the ignition off, pump the brake pedal 20 to 30 times to bleed the residual vacuum out of the servo — you'll feel the pedal go progressively harder as the reservoir empties. This step prevents nasty surprises when you disconnect the vacuum hose later.
Step 2: Remove the master cylinder
Syphon as much fluid as you can out of the reservoir with a clean syringe, then unclip the fluid level sensor plug. Crack the brake pipe unions on the master cylinder with a flare-nut spanner — go gently, as these can seize — and plug them immediately to keep dirt out and fluid in. Undo the two nuts securing the master cylinder to the front face of the servo and ease it forward. On most Expert variants you don't need to fully remove it; carefully swinging it aside on its pipes gives enough clearance, provided you don't kink anything.
Step 3: Detach the vacuum hose and brake pedal linkage
Pull the vacuum hose off the front of the servo and inspect the non-return valve — if it rattles when shaken or shows cracks, replace it. Now move inside the cab. Fold back the driver's carpet or trim panel under the steering column to expose the brake pedal. There's a clevis pin with a small clip holding the servo pushrod to the top of the pedal. Prise off the clip, slide the pin out, and the pedal will drop free.
Step 4: Unbolt and remove the old servo
Still inside the cab, you'll see four nuts on studs protruding through the bulkhead — these hold the servo in place. Undo them with a deep socket and long extension. Back in the engine bay, the servo can now be wiggled free. It's a tight extraction thanks to the wiring loom and washer bottle nearby, so take your time and tilt it as you pull. Recover the old gasket and clean the bulkhead face thoroughly.
Step 5: Fit the new servo and reassemble
Offer up the new servo with a fresh gasket, aligning the studs through the bulkhead. Have someone inside the cab start the four retaining nuts on the pedal box, then torque them evenly to the manufacturer's specification. Refit the clevis pin and clip to the pedal, then reconnect the vacuum hose. Bolt the master cylinder back onto the front of the servo — again, torque it evenly — and reconnect the brake pipes, tightening the unions carefully to avoid cross-threading.
Step 6: Bleed the brakes and test
Top up the reservoir with fresh DOT 4 fluid. Bleed the entire brake system in the correct sequence — usually starting furthest from the master cylinder — until the pedal feels firm and no air comes through. Reconnect the battery, start the engine, and check that the pedal drops slightly as vacuum builds. With the van stationary, press the pedal hard several times to check for leaks around the master cylinder and pipe unions. Only when you're satisfied should you take it for a low-speed road test in a safe area, checking pedal feel and stopping performance progressively before returning to normal use.
Common pitfalls and safety checks
The most frequent mistake DIYers make on the Expert is over-tightening the brake pipe unions and stripping the threads in the master cylinder — snug is enough, they seal on taper, not brute force. Another is forgetting to check the vacuum hose and non-return valve; a leaking hose will make a brand-new servo feel just as tired as the old one. Also double-check the clevis pin clip is properly seated inside the cab — if it drops out, you lose brakes entirely.
Once the job is done, always inspect the wheels for signs of fluid leaks after the first few drives, and re-check pedal travel after a week. If anything feels spongy, inconsistent, or if the pedal sinks under steady pressure, stop driving the van and investigate immediately.
When to hand it to a professional
Changing a brake servo is within the reach of a competent home mechanic, but it's not a job to attempt if you're unsure about brake systems. Any van with ABS and stability control — which covers most Peugeot Experts from the second generation onwards — may need a diagnostic scan tool to properly bleed the ABS block after the system has been opened. If air gets trapped in the ABS modulator, no amount of pedal pumping will get it out.
Equally, if the master cylinder unions are seized solid, if the servo studs have corroded through the bulkhead, or if you don't have a safe space to road-test the van afterwards, the sensible option is to book it into a garage. Brakes are the one system where getting it wrong has immediate and serious consequences.
Thinking of upgrading? Consider a newer Peugeot Expert
If your Expert is at the age where the servo, master cylinder, and other ancillaries are all starting to fail in quick succession, it may be worth weighing the cost of ongoing repairs against a newer van. Later Peugeot Expert models bring improved braking systems, better fuel economy, and modern safety kit like autonomous emergency braking and lane assist — features that reduce wear on the mechanical brake components in the first place.
Whether you decide to keep your current van running strong or move on to something newer, the important thing is that the brakes are always in top condition. A servo replacement done properly should give you many more years of reliable, confident stopping — exactly what a working van needs.
FAQs
How do you replace the brake servo on a Peugeot Expert van?
Replacing the brake servo on a Peugeot Expert involves disconnecting the battery, depressurising the system by pumping the pedal, removing the master cylinder from the front of the servo, detaching the vacuum hose, unclipping the pushrod from the brake pedal inside the cab, and undoing the four nuts that hold the servo to the bulkhead. The new unit is fitted with a fresh gasket, the master cylinder is reattached, and the entire brake system is then bled with fresh DOT 4 fluid before road testing. Allow around half a day and, if your van has ABS, be prepared to use a diagnostic tool to bleed the modulator properly.
How long does it take to change a brake servo on a Peugeot Expert?
For a competent DIY mechanic with the right tools, expect four to six hours including bleeding the brakes. A professional garage will typically quote two to three hours of labour. The job takes longer if the brake pipe unions are seized or if the ABS system needs a scan tool to fully bleed.
Can I drive my Peugeot Expert with a faulty brake servo?
It's not advisable. A failing servo dramatically increases pedal effort and stopping distances, which is dangerous in a working van that may be carrying heavy loads. You may also fail an MOT on brake performance. If you notice a hard pedal, hissing noises, or the engine stalling when braking, get the van checked before continuing to use it.
How much does it cost to replace a brake servo on a Peugeot Expert?
Parts alone typically run from around £150 to £350 depending on the model year and whether you fit a genuine Peugeot unit or a quality aftermarket equivalent. Garage labour usually adds another £200 to £400 on top, plus brake fluid and any incidental parts like a new vacuum hose or non-return valve. Doing it yourself can save significantly, provided you're confident working on brake systems.
Do I need to bleed the brakes after changing the servo?
Yes. Because the master cylinder has to be removed to access the servo, the hydraulic circuit is opened and air will enter the system. You must bleed all four brakes in the correct sequence with fresh DOT 4 fluid until the pedal feels firm and consistent. Vans fitted with ABS may also need the modulator block bled using a diagnostic tool to remove any trapped air.