How to Change a Wing Mirror on a VW Caravelle: Step-by-Step Guide
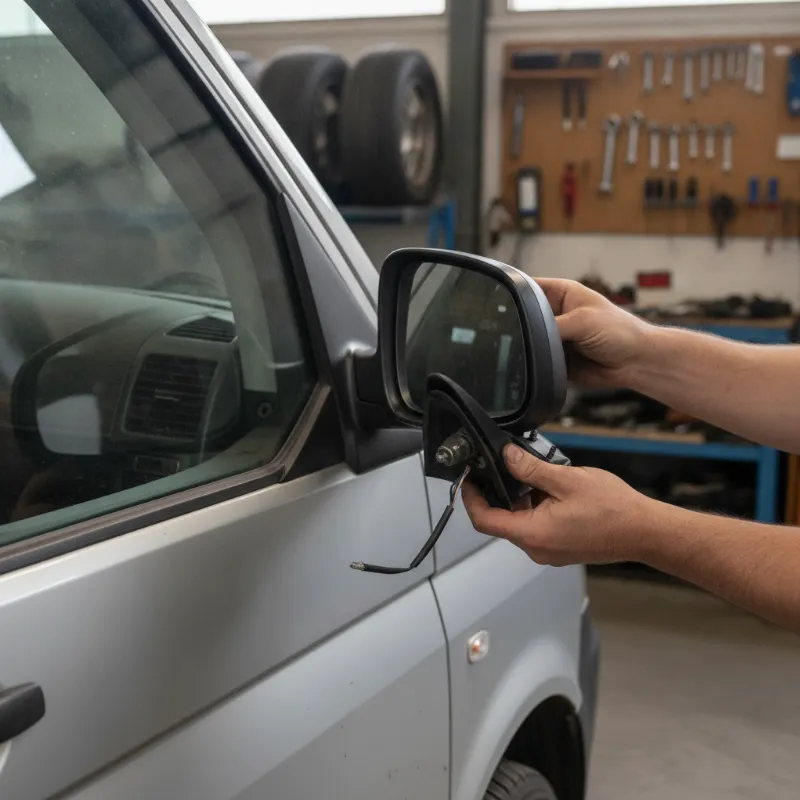
Before You Start: Tools and Preparation
Replacing a wing mirror on a VW Caravelle is a job most confident DIYers can tackle at home in around 30 to 45 minutes, provided you have the right kit and a bit of patience. Whether you've clipped a mirror on a narrow country lane, had one folded back by a passing vehicle, or simply want to swap in a heated or power-folding upgrade, the process is largely the same across most Caravelle generations (T5, T6 and T6.1). Before you dive in, it pays to gather your tools, work out exactly which mirror your van is fitted with, and set aside a clear, dry workspace.
Take a moment to disconnect the battery if you're working on a mirror with electrical functions such as heating, indicators or power adjustment. This prevents any short circuits when you unclip the wiring loom and protects the delicate control modules inside the door.
Tools You'll Need
You won't need a professional workshop to get this job done, but you will need a small collection of hand tools. At a minimum, have the following to hand:
- A Torx bit set (typically T20 and T25 for the interior trim, and larger Torx or hex bolts for the mirror mounting)
- A plastic trim removal tool or a wide flat-blade screwdriver wrapped in tape
- A soft cloth to protect the door card and paintwork
- A small container for the fixings so nothing gets lost
- Your replacement wing mirror, ideally with the correct connector and colour-matched housing
- A helper if you have one — mirrors can be surprisingly heavy and awkward to hold in place while you thread the bolts
Identifying Your VW Caravelle Wing Mirror Type
The Caravelle has been produced in several specifications, and the wing mirror on your van could be anything from a basic manually adjusted unit to a fully loaded assembly with heating, electric adjustment, power folding, puddle lights and integrated indicators. Before ordering a replacement, count the pins on the electrical connector inside the door — a basic heated and electric mirror typically has around 5 pins, while power-folding mirrors with lighting can have 8 or more.
Also check whether your van is a T5, T6 or T6.1, as mirror housings and mounting patterns differ slightly between generations. Take a clear photo of the existing mirror, the connector, and any part numbers printed on the housing before you order — this saves an expensive return later.
How to Remove the Old Wing Mirror on a VW Caravelle
With your tools laid out and the correct replacement ready, you can begin removing the old mirror. Work slowly, especially with the plastic trim — it's the part most likely to crack if forced. If your van is more than a few years old, the clips may have become brittle, so gentle, even pressure is key.
Prising Off the Interior Trim Cover
Start by opening the front door and locating the small triangular plastic trim panel on the inside, where the mirror meets the door frame. On the Caravelle this cover is usually held in place by a couple of clips and, on some models, a small Torx screw hidden behind a cap. Ease your trim tool between the panel and the door card and work your way around the edge, applying gentle outward pressure until the clips release.
Once the trim is loose, you'll see the wiring connector and the mirror mounting bolts. Don't yank the trim off — there may be a short wiring stub attached to it on higher-spec models, so lift it clear and set it safely aside on a clean cloth.
Disconnecting the Electrical Wiring
Locate the electrical plug for the mirror. It usually has a small tab or clip that must be pressed in before it will separate. Squeeze the tab and pull the connector apart carefully — don't tug on the wires themselves. If the connector is stiff, a gentle wiggle from side to side helps release it. Feed the loom out through the rubber grommet in the door frame if needed, taking care not to lose the grommet inside the door cavity.
Unbolting the Mirror Assembly
With the wiring free, support the mirror from the outside with one hand — this is where a helper is useful. Using the correct Torx or hex driver, undo the three mounting bolts that secure the mirror to the door. Keep firm pressure on the mirror from outside so it doesn't drop and scratch the paintwork as the last bolt comes free. Once all three are out, lift the mirror away from the door and place it somewhere safe.
How to Fit the New Wing Mirror
Fitting the new mirror is essentially the removal process in reverse, but it pays to take your time and check everything lines up cleanly before tightening anything fully.
Aligning and Bolting the New Mirror
Offer the new mirror up to the door, feeding the wiring loom through the grommet hole first. Make sure the rubber gasket or foam seal between the mirror base and the door is seated correctly — this prevents water ingress and wind noise later. Start all three mounting bolts by hand before tightening any of them, which makes alignment much easier. Once they're all threaded, tighten them evenly in a criss-cross pattern to a firm but not overtightened torque — around 5 Nm is usually plenty for the plastic-backed mounting points.
Reconnecting the Wiring and Testing
Push the electrical connector back together until you hear it click. Before refitting the interior trim, reconnect the battery (if you disconnected it) and test every function: electric adjust up, down, left and right; heating (feel the glass warm after a minute or two); indicator (if fitted); and power fold if applicable. It's much easier to spot a wiring fault now than after you've clipped everything back together. Once you're satisfied, refit the interior trim panel by lining up the clips and pressing firmly until it seats flush against the door card.
Common Issues and Troubleshooting
The most common problem people run into is a mirror function that doesn't work after fitting. If the electric adjustment or heating is dead, first double-check the connector is fully seated — it's easy to think it's clicked home when it hasn't. Next, verify you've ordered a mirror with a matching pin count and specification; a 5-pin mirror plugged into a 6-pin loom will leave one function unpowered.
Wind noise or a whistling sound at motorway speeds usually points to a poorly seated gasket or a mounting bolt that hasn't been tightened evenly. Water inside the housing after a wash suggests the seal isn't compressed properly — remove the mirror, reseat the gasket, and refit. Cracked interior trim clips are another frequent issue; replacement clips are inexpensive and worth fitting rather than hoping the trim will stay put.
When to Get a Professional Involved
While a straightforward mirror swap is well within reach for a home mechanic, there are situations where it's worth handing the job over to a specialist. If your Caravelle has power-folding mirrors with camera or blind-spot modules integrated into the housing, these often need coding to the vehicle with VW-specific diagnostic equipment before they'll function correctly. Similarly, if the mounting point on the door itself is damaged — for example after a heavy knock that has pulled the threads out — a bodyshop repair may be needed before a new mirror can be fitted safely.
If you're not confident working around airbag wiring in the door, or your van is still under warranty and you'd rather not risk voiding it, a VW-approved technician will do the job quickly and guarantee the work.
Looking to Upgrade Your VW Caravelle?
If your current Caravelle is starting to feel its age, or a broken mirror has you thinking about a change altogether, it might be the right moment to look at your next van. The Caravelle range continues to offer one of the most versatile blends of family transport and commercial capability on the market, and newer models bring welcome upgrades like power-folding mirrors as standard, improved driver assistance, and refined interiors.
Whether you're after a low-mileage used example or want to explore the latest specifications, speak to a trusted VW van dealer who can talk you through the options, part-exchange your current vehicle, and help you find a Caravelle that fits your budget and the way you use your van.
FAQs
How do you change the wing mirror on a VW Caravelle?
To change a wing mirror on a VW Caravelle, disconnect the battery, prise off the small triangular interior trim panel inside the door, unplug the electrical connector, and undo the three Torx or hex bolts holding the mirror to the door. Lift the old mirror away, then fit the new one by feeding the wiring through, seating the gasket, and tightening the bolts evenly. Reconnect the wiring, test all mirror functions, and refit the interior trim. The whole job typically takes 30–45 minutes.
How long does it take to replace a Caravelle wing mirror?
For most home mechanics, replacing a Caravelle wing mirror takes between 30 and 45 minutes. It can be quicker on a basic manual mirror, or a little longer on higher-spec models with power folding and integrated lighting, where you'll want to take extra care with the wiring and testing.
Do I need to code a new VW Caravelle mirror to the van?
Standard heated and electric mirrors are usually plug-and-play and don't need coding. However, mirrors with power folding, integrated cameras, or blind-spot monitoring often need to be coded to the vehicle using VW diagnostic equipment before all functions work correctly. If in doubt, check with a VW specialist before ordering.
Can I just replace the mirror glass instead of the whole unit?
Yes — if only the glass is cracked and the housing and motors are intact, you can replace just the mirror glass. It clips onto the adjustment mechanism and can usually be swapped in a few minutes. If the housing is cracked, the indicator lens is broken, or the electrics have failed, you'll need to replace the whole assembly.
Where can I buy a replacement wing mirror for a VW Caravelle?
Replacement mirrors are available from VW main dealers, van specialists, and online motor factors. Always match the part to your van's exact model year, generation (T5, T6 or T6.1), and specification — count the pins on the electrical connector and note any part numbers on the existing mirror to avoid ordering the wrong unit.