How to Replace a Peugeot Expert Gear Stick: A Step-by-Step DIY Guide
Why the Peugeot Expert Gear Stick May Need Replacing
The Peugeot Expert is one of the most reliable medium panel vans on UK roads, but even the best workhorses develop niggles over time. The gear stick is one of the most heavily used components in the cab — every shift, every reverse manoeuvre, every clutch-and-change adds wear to the mechanism. After tens of thousands of miles it's not unusual to notice a wobbly gear knob, a spongy feel when selecting gears, or a stick that no longer sits centred in neutral.
Common symptoms that point to a worn or damaged gear stick include difficulty engaging reverse, gears popping out under load, excessive side-to-side play at the top of the lever, or a grinding noise when shifting. On higher-mileage Experts the plastic bushes at the base of the lever wear down, and the ball joint that seats the stick into the housing can crack. Left unresolved, a failing gear stick can leave you stranded — so replacing it early is often the sensible call.
The good news is that swapping the gear stick on a Peugeot Expert is a job most competent DIYers can tackle at home in a couple of hours, with basic tools and a bit of patience. Below is a practical, step-by-step guide to doing the job properly.
Tools and Parts You'll Need Before You Start
Before you start pulling trim apart, gather everything you'll need in one place. Nothing slows a driveway repair down more than realising you're missing a socket size halfway through. For a standard Peugeot Expert gear stick replacement you'll want:
- A socket set with 8mm, 10mm and 13mm sockets, plus a short extension bar
- Torx bits (typically T20 and T25 for the console screws)
- A trim removal tool or plastic pry bar to avoid scratching the dash
- A flat-head and Phillips screwdriver
- Long-nose pliers for the linkage cable clips
- A pair of gloves and a clean rag
- The replacement gear stick assembly — genuine Peugeot part or a good-quality OEM equivalent
- New cable-end bushes if yours look worn (often supplied with the new assembly)
- A small amount of white lithium grease for the linkage points
Always double-check the part number against your V5C and chassis details before ordering. The Expert has been through several generations — the 2007–2016 model uses different linkage components to the current Stellantis-era Expert, so a mismatched part will not fit.
Step-by-Step: How to Replace the Peugeot Expert Gear Stick
Park the van on level ground, apply the handbrake firmly, and put the gearbox in neutral. Disconnect the negative battery terminal as a precaution before you begin, particularly if you're working near the wiring loom that runs under the centre console.
Removing the Centre Console and Gaiter
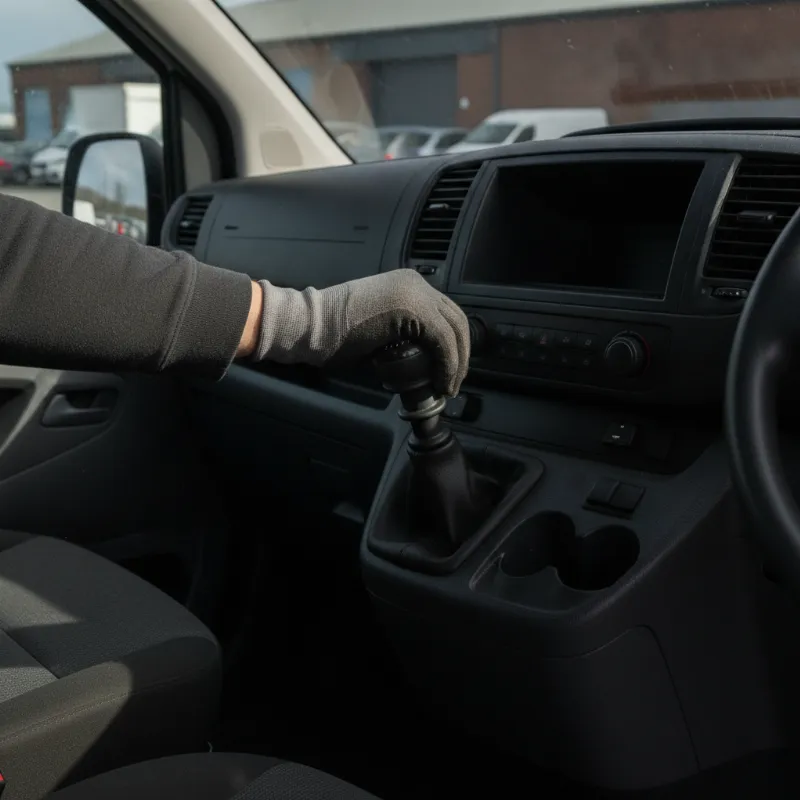
Start at the top. The gear knob on most Expert models unscrews anti-clockwise — grip it firmly and turn. Some later versions have a small grub screw or clip at the base of the knob, so inspect it first before applying force. Once the knob is off, carefully lift the gaiter and surround trim upwards. It's held by clips rather than screws, so a plastic trim tool worked around the edges will pop it free without cracking the plastic.
With the gaiter out of the way, remove the screws securing the centre console section. There are usually two or three Torx screws hidden inside the cup holder or storage tray, plus fixings near the handbrake lever. Lift the console clear and set it aside on a soft surface. You should now be looking straight down at the base of the gear stick housing bolted to the transmission tunnel.
Disconnecting the Gear Linkage Cables
Two cables connect the gear stick to the gearbox — one for selection (side-to-side) and one for engagement (forward-back). Each cable is held to the base of the lever by a plastic clip and a ball socket. Use long-nose pliers to gently prise the retaining clips upwards, then pop each cable end off its ball stud. Take a photo before you disconnect anything so you know exactly which cable goes where on refitting.
Inspect the cable ends closely. If the plastic bushes are cracked, chewed or missing, replace them now — reusing worn bushes is the single biggest reason a "fixed" gear stick still feels sloppy afterwards. Once the cables are free, unbolt the four nuts (typically 10mm or 13mm) securing the gear stick housing to the floor of the cab and lift the whole assembly out.
Fitting the New Gear Stick Assembly
Position the new assembly over the mounting studs and tighten the nuts evenly in a diagonal pattern to avoid distorting the base. Reconnect the linkage cables by pressing each ball socket firmly onto its stud until it clicks, then slide the retaining clips back down to lock them in place. A dab of white lithium grease on the ball joints will keep the action smooth and quiet.
Before reassembling the console, sit in the driver's seat and cycle through every gear including reverse. The stick should move crisply into each position without binding. If a gear feels awkward to select, the cables may need minor adjustment at the gearbox end — most Expert linkages have a small adjuster collar you can rotate to fine-tune the throw. Once you're happy, refit the console, gaiter and gear knob in reverse order, reconnect the battery, and take the van for a short test drive.
Common Mistakes to Avoid During the Swap
The most frequent mistake is overtightening the housing bolts. The mounting studs thread into a relatively thin metal panel, and cranking them down too hard can strip the threads or crack the plastic housing base. Snug is fine — you're not torquing wheel nuts.
Another common slip is forgetting to note which cable goes to which ball stud. Swapping them over means your gear pattern will be mirrored, and you'll be hunting for first when you think you're in reverse. Take the photo. Trust us.
Finally, don't reuse tired cable bushes just because the van "seemed to shift okay" beforehand. New bushes cost a few pounds and transform the feel of the change. Skipping them almost guarantees you'll be back under the console within a year.
When to Call a Professional Instead
DIY has its limits. If, after fitting the new stick, you still can't select all gears cleanly, the fault may lie further down the drivetrain — worn linkage cables themselves, a failing gearbox selector shaft, or clutch issues masking as a gear stick problem. These need diagnosis on a ramp with the right tools, and pushing on regardless can turn a £60 part swap into a gearbox rebuild.
Similarly, if you're not confident removing interior trim without breaking clips, or if your Expert is still under warranty or a service plan, it's worth having a Peugeot specialist or trusted independent LCV garage handle the job. Labour is usually only an hour or two, and you'll get a proper road test as part of the work.
Thinking of Upgrading? Explore Our Peugeot Expert Range
Sometimes a wobbly gear stick is the final straw on a van that's already reaching the end of its economic life. If your Expert is showing its age in other ways — tired clutch, patchy service history, rising running costs — it may be worth weighing up a repair against a newer replacement. The current Peugeot Expert range offers sharper handling, better fuel economy and modern driver-assistance features that make long days behind the wheel far more comfortable.
Whether you're after a used Expert with a fresh MOT or a nearly-new example with balance of manufacturer warranty, our team can help you find the right van for your workload and budget. Get in touch to arrange a viewing or a no-obligation part-exchange valuation on your current Expert.
FAQs
How do you replace the gear stick on a Peugeot Expert van?
Start by removing the gear knob, gaiter and centre console to expose the gear stick housing. Disconnect the two linkage cables from the ball studs at the base of the lever, unbolt the housing from the transmission tunnel, and lift the old assembly out. Fit the new gear stick in the reverse order, reconnect the cables (checking each goes back on the correct stud), tighten the mounting nuts evenly, and test every gear before reassembling the trim. The job typically takes one to two hours with basic hand tools.
How long does it take to replace a Peugeot Expert gear stick at home?
For a competent DIYer with the right tools, expect around 1.5 to 2 hours from start to finish. First-timers should allow half a day to work carefully, especially around the trim clips which can be fragile on higher-mileage vans.
How much does a replacement Peugeot Expert gear stick cost?
Genuine Peugeot gear stick assemblies typically range from around £60 to £150 depending on the model year and specification. Good-quality OEM equivalents can be found for less, but always check the part number against your van's chassis to make sure it fits your generation of Expert.
Can a worn gear stick damage the gearbox?
A worn stick or perished linkage bushes can cause incomplete gear engagement, which over time may accelerate wear on the synchros and selector forks inside the gearbox. If shifts feel notchy or gears occasionally pop out, it's worth addressing the linkage promptly rather than waiting for a more expensive gearbox repair.
Do I need to disconnect the battery to change the gear stick?
It's not strictly essential on every model, but disconnecting the negative battery terminal is good practice. There's wiring for airbags, switches and sensors running under the centre console, and isolating the battery avoids any risk of shorts or accidental airbag deployment while you're working.