How to Fit a Towbar to a Peugeot Partner: Step-by-Step Guide
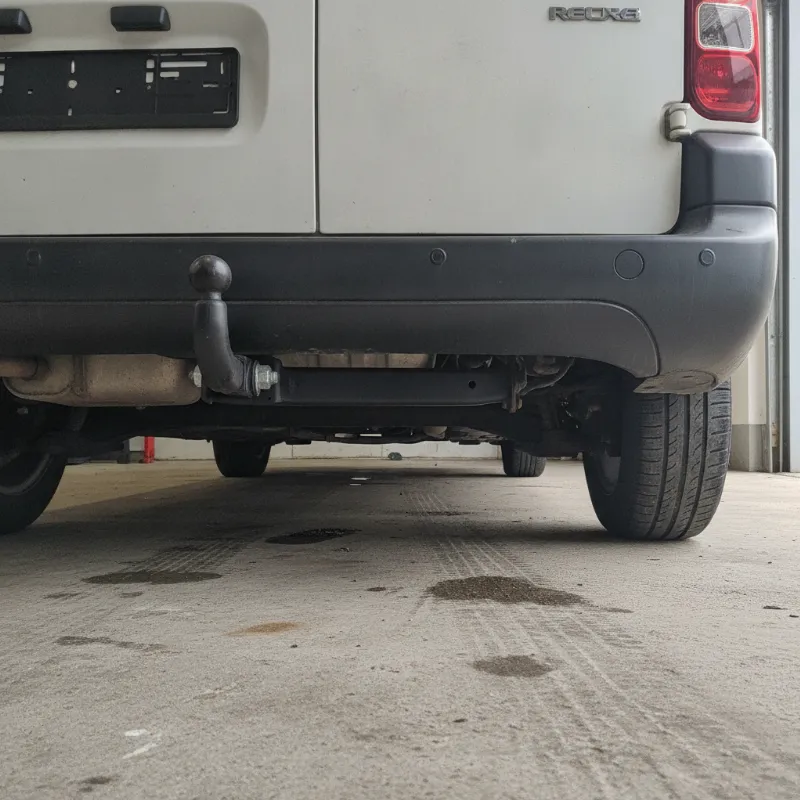
Can You Fit a Towbar to a Peugeot Partner Yourself?
Fitting a towbar to a Peugeot Partner is well within reach of a competent DIY mechanic, provided you have the right tools, a safe working space and a full afternoon to spare. The Partner has been designed with dedicated chassis mounting points on both sides of the rear underbody, which means most modern towbar kits bolt straight on without the need for drilling. That said, the job does involve working under the van, handling heavy steel components and integrating with the vehicle's electrical system, so it is not something to rush.
Whether you're towing a small trailer for garden waste, a plant trailer for work, or a caravan for weekends away, the principles are the same. The main considerations are choosing a towbar that is type-approved for the Partner (look for an EC 94/20 or R55 approval number), making sure your wiring is compatible with the Partner's CAN-Bus electrical architecture on later models, and torquing every bolt correctly. Get those three things right and a home fit will be just as safe as a garage installation.
Tools and Parts You'll Need Before Starting
Before you start unbolting anything, lay out everything you'll need so you don't have to break off halfway through. At a minimum you'll want a good trolley jack and a pair of axle stands, a socket set including deep sockets in the 17mm to 21mm range, a torque wrench capable of reaching around 100 Nm, a set of Torx bits (T20 to T50 covers most Partner fixings), a trim removal tool, wire strippers, crimps and heat shrink, plus a multimeter for checking the electrics. A second pair of hands is invaluable when it comes to lifting the towbar into place.
On the parts side, you'll need a Peugeot Partner-specific towbar kit (generic universal bars rarely line up correctly), a wiring kit matched to your intended use, and ideally a small tub of copper grease or thread lock for the mounting bolts. Check the box contents against the fitting instructions before you start — missing a single spacer plate can bring the whole job to a halt.
Choosing the Right Towbar Type (Flange, Swan Neck or Detachable)
There are three common towbar styles to consider for a Partner. A fixed flange towbar uses a bolt-on tow ball and is the most versatile option — it lets you fit bumper protection plates, stabilisers and high/low adjustable necks, which is why it remains popular with tradespeople who tow trailers regularly. A swan neck towbar has a smoother, one-piece appearance and is neater for occasional caravan use, but it doesn't accept accessories as easily. A detachable towbar combines a clean look when not in use with the strength of a fixed bar, and is a great choice if you want the Partner to double as a family vehicle at weekends.
Cost typically rises in that order, with detachable neck systems being the most expensive. Whichever you pick, make sure it is specifically listed for the Partner generation you own — the pre-2008, 2008–2018 and post-2018 (K9) models all use different mounting arrangements.
Wiring Kits: 7-Pin vs 13-Pin Explained
The wiring kit is what turns your trailer's lights and, on a caravan, its interior electrics into a working extension of the van. A 7-pin single electrics kit handles the basics: indicators, brake lights, tail lights, fog and reverse. It's ideal if you're only ever going to tow a box trailer, plant trailer or small unbraked utility trailer. A 13-pin kit combines those functions with a permanent live and a switched live feed, powering caravan fridges, leisure batteries and interior lighting.
Later Peugeot Partner models use a CAN-Bus system, meaning a dedicated vehicle-specific wiring kit is required — you cannot simply splice into the rear light wiring as you might on older vans. A vehicle-specific kit plugs into a dedicated port and often needs coding via a diagnostic tool so the van "knows" a trailer is attached, activating trailer stability control and disabling rear parking sensors when the towbar is in use.
Step-by-Step: How to Fit a Towbar to a Peugeot Partner
With the tools laid out and the kit checked, you're ready to start. Park the van on level ground, chock the front wheels, and read the manufacturer's fitting instructions all the way through before you pick up a spanner. The steps below give an overview of what to expect, but always follow the specific torque figures and sequences supplied with your particular towbar.
Step 1 – Preparing the Van and Removing the Rear Bumper
Start by disconnecting the negative terminal of the battery — this protects the ECU when you're working near the rear wiring later. Open the rear doors and remove the plastic scuff plate along the load area sill, then locate the bumper fixings. On most Partner models this means unclipping the wheel arch liners at each end, removing two or three Torx screws inside each arch, and undoing the bolts hidden along the top edge of the bumper. Some models also have fixings accessed from underneath.
With all fasteners out, gently pull the bumper rearward and away from the van. It should slide free once the side clips release. If the van has rear parking sensors, disconnect the sensor loom before you fully separate the bumper. Set it aside somewhere it won't get scratched.
Step 2 – Bolting the Towbar to the Chassis Mounting Points
You should now be able to see the factory towbar mounting points on the underside of the chassis rails. Clean any road dirt away and check for corrosion. Offer the towbar up — this is genuinely a two-person job as the bar is heavy and awkward. Start every bolt by hand to make sure the threads are engaging cleanly, then run them up finger tight before you reach for the torque wrench.
Once everything is aligned, work through the bolts in the sequence given in your fitting instructions and torque each one to the specified value, typically between 80 and 110 Nm. Apply a dab of thread lock if the manufacturer recommends it. Give the bar a firm shake once torqued — there should be zero movement.
Step 3 – Connecting the Electrical Wiring Loom
Feed the wiring loom through the grommet in the rear panel and route it forward along the existing chassis looms, using cable ties to keep it away from moving parts and hot exhaust components. On a vehicle-specific kit you'll find a dedicated plug-and-play connector behind a trim panel in the boot area — locate it, plug in the loom, and secure the control module in place with the supplied Velcro or bracket.
If you have a non-vehicle-specific kit, you'll be splicing into the rear light wiring using scotch locks or, ideally, solder joints with heat shrink. Take your time to identify each wire correctly with a multimeter before cutting anything. Mount the 7-pin or 13-pin socket to the towbar bracket, connect the earth wire securely to a clean chassis point, and coil any excess loom out of the way.
Step 4 – Refitting the Bumper and Testing
Some towbar kits require a small section of the bumper's lower valance to be cut out to allow clearance for the tow ball or neck — check the template supplied and mark carefully before cutting. Reconnect the parking sensor loom if fitted, then offer the bumper back up and clip it into place, refitting all screws and bolts in reverse order.
Reconnect the battery and test every function. Plug a trailer board or a known-good trailer into the socket and check indicators, brake lights, tail lights, fog and reverse. If a vehicle-specific kit needs coding, this is the moment to plug in a diagnostic tool (or take it to a specialist) to enable trailer mode. Finish by hitching up a light trailer and checking clearance and geometry before your first proper tow.
Fitting a Towbar to a Peugeot Partner LWB (Long Wheelbase)
Fitting a towbar to the long wheelbase Partner is essentially the same job as on the standard short wheelbase, but there are a few differences worth flagging. The LWB has additional chassis length behind the rear axle, which means the towbar itself is a different part number with a longer or differently shaped extension arm — never try to force a SWB bar onto an LWB, or vice versa.
The wiring loom is also longer and the routing runs further along the underbody. Take extra care to keep it well clear of the exhaust and secure it every 30cm or so with cable ties. Because the LWB has a longer rear overhang, nose weight calculations become more sensitive, so pay close attention to trailer loading once fitted.
Peugeot Partner Towing Capacity and Dimensions to Know
Before you tow anything, check the exact figures for your specific Partner in the V5C and the driver's handbook, as they vary by engine, trim and year. As a general guide, most modern Partner vans have a braked towing capacity of around 1,000 to 1,500kg depending on engine, with an unbraked limit of 750kg. Nose weight is typically limited to around 75kg on the tow ball itself, though the towbar's own rating may be higher — always work to the lower of the two figures.
The standard tow ball height is around 350–420mm from the ground when unladen. Also check your gross train weight (GTW) on the vehicle plate: this is the total permitted weight of van plus trailer combined, and it's the figure that most often trips people up when they overload a caravan or plant trailer.
Common Problems and Pitfalls When Fitting a Partner Towbar
The most frequent issue people run into is corroded factory bolts, especially on Partners that have spent winters on salted roads. Soak them in penetrating fluid the night before you start and don't be afraid to use a breaker bar. Rounded heads are a nightmare to remove with the bumper still in the way. A close second is misaligned mounting points caused by past rear-end knocks — if the towbar won't sit flush, don't force it, investigate why.
Electrical gremlins are the other big pitfall. Fitting a generic wiring kit to a CAN-Bus Partner can trigger warning lights, disable rear fog lights or cause the trailer indicators to flash at double speed. Always use a Partner-specific wiring kit and be prepared to have it coded in. Finally, don't forget to update your insurer — a towbar fitted at home is still a modification that most insurers want to know about.
When to Use a Professional Fitter Instead
Home fitting saves money, but it isn't for everyone. If you don't have access to axle stands or a level, hard-standing driveway, if your Partner is a late model with a heavily integrated CAN-Bus system that needs main-dealer-level coding, or if you simply don't fancy spending four hours under a van, a professional fitter will typically complete the job in two to three hours with a full guarantee on parts and labour.
Mobile fitters will come to your home or workplace, which is often cheaper than a franchised dealer and more convenient than dropping the van off. Expect to pay a few hundred pounds all in, depending on towbar type and wiring specification. For fleet users, having a professional invoice on file also simplifies any future warranty or insurance claims.
FAQs: Fitting a Towbar to a Peugeot Partner
Below are answers to the questions we hear most often from Partner owners planning a towbar installation. If your situation is more unusual — for example a converted welfare or crew van — it's worth speaking to a specialist before ordering parts.
FAQs
How do you fit a towbar to a Peugeot Partner van, step by step?
In summary: disconnect the battery, remove the rear bumper by undoing the Torx screws in the wheel arches and along the top edge, offer the towbar up to the factory chassis mounting points, bolt it in place and torque to the manufacturer's specification (typically 80–110 Nm), route and connect the wiring loom (using a vehicle-specific kit on CAN-Bus models), refit the bumper with any required cutout, reconnect the battery, and test all trailer lighting functions before your first tow. Allow around three to four hours for a first-time DIY fit.
How long does it take to fit a towbar to a Peugeot Partner at home?
A competent DIY mechanic should budget three to four hours for a first-time fit, including reading the instructions, prepping tools and testing the electrics. A professional fitter with the right ramps and diagnostic equipment will usually complete the same job in around two to three hours.
Do I need to code the Peugeot Partner after fitting a towbar?
On older pre-CAN-Bus Partners, no — the wiring is a simple splice into the rear lights. On later models with CAN-Bus electrics, a vehicle-specific wiring kit is required and coding via a diagnostic tool is usually needed to enable trailer mode, activate stability control and disable rear parking sensors when a trailer is attached.
How much weight can a Peugeot Partner tow?
It depends on the exact engine, gearbox and year, but most modern Partners are rated to tow between 1,000kg and 1,500kg braked, with an unbraked limit of 750kg and a nose weight of around 75kg. Always check the V5C, the vehicle plate and the driver's handbook for the exact figures for your van.
Is it cheaper to fit a Peugeot Partner towbar yourself?
Yes, DIY fitting typically saves a meaningful amount versus a professional installation, as you're only paying for the towbar and wiring kit rather than labour. However, factor in the cost of any tools you don't already own, and remember that a professional fit usually comes with a workmanship guarantee, which can be valuable if you ever need to claim on it.