![]() Call us on 01656 674620
Call us on 01656 674620
![]() Call us on 01656 674620
Call us on 01656 674620
All makes all models. We fit rear seats safely. Choose from budget or better than OEMr

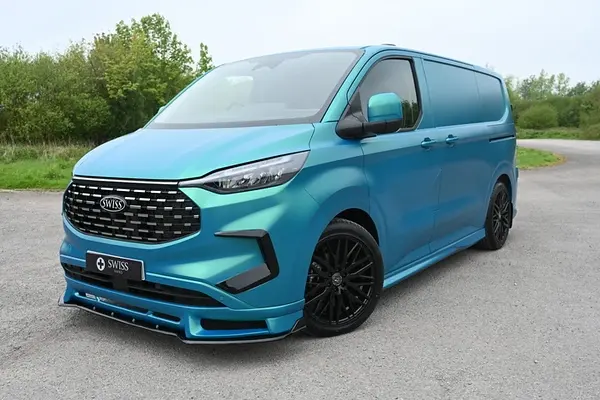
Body kits fitted fast to most recent vans. Ford Custom. Very popular. Rent a car or van from us while its in
Book Your Car or Van In UK wide for leather. We need a large well lit garage. Or bring to Cowbridge
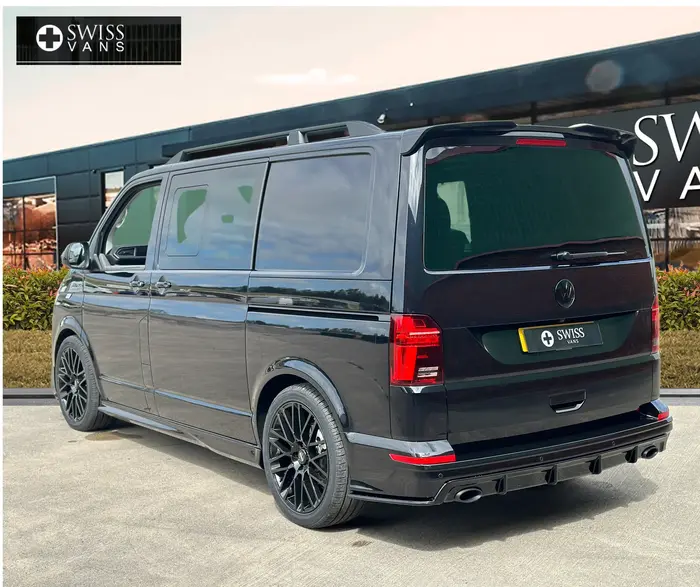
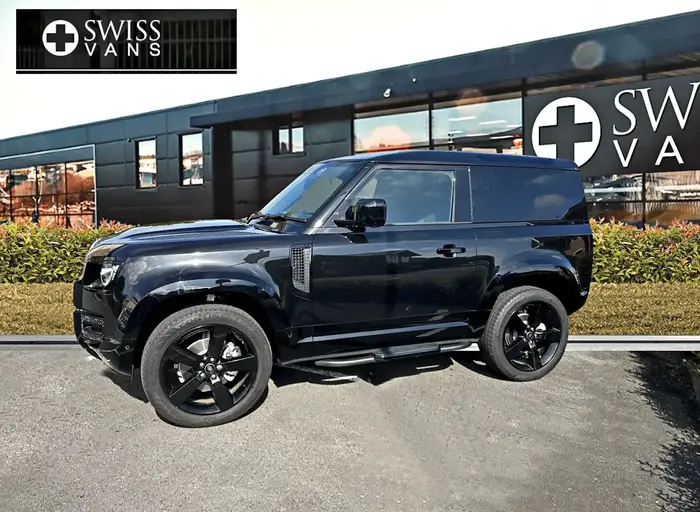
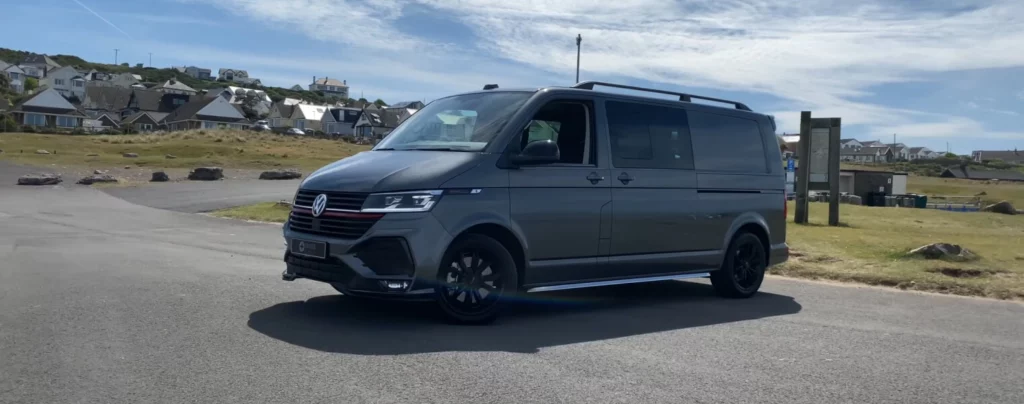
Head-turning looks for the ultimate in curb appeal with splitters, spoilers, alloys, and more. WASP and Hornet upgrades are most popular.
We’ve also got plenty of individual van upgrades if you don’t want a kit. Get creative and design your dream van.
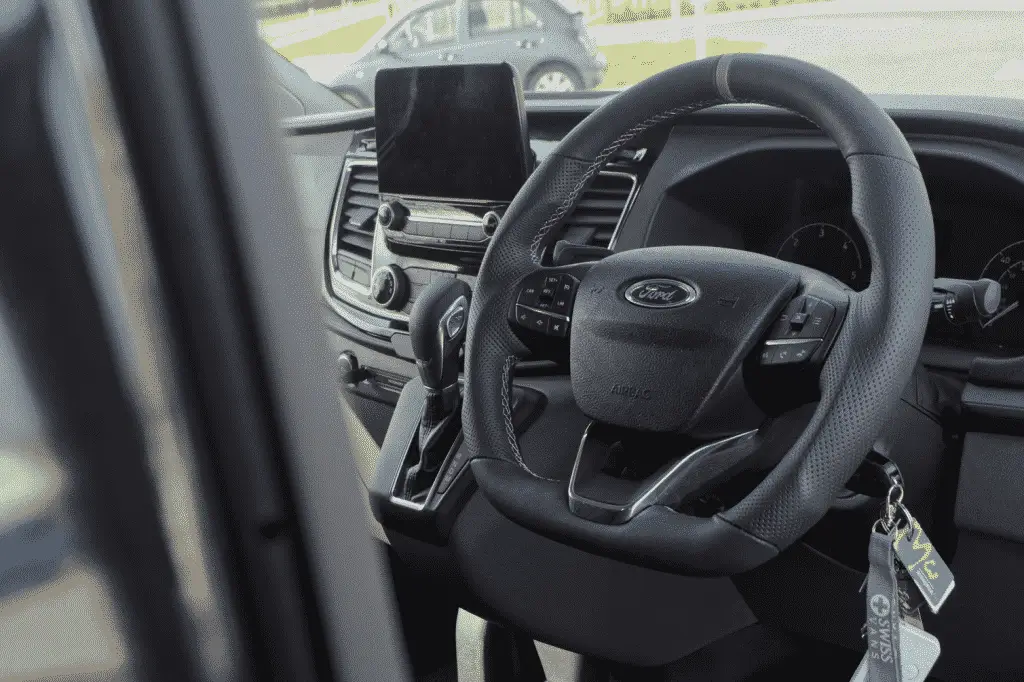
You spend a lot of time in your van, so why not make it just how you want it?
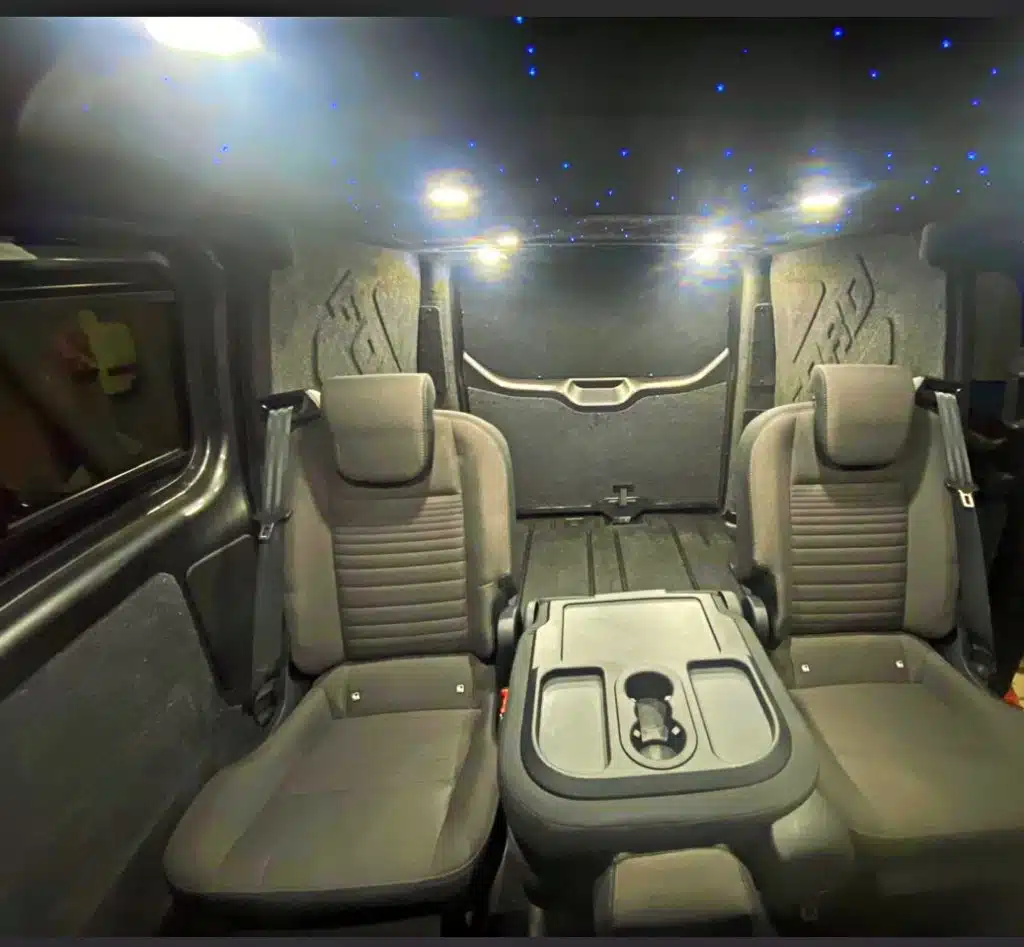
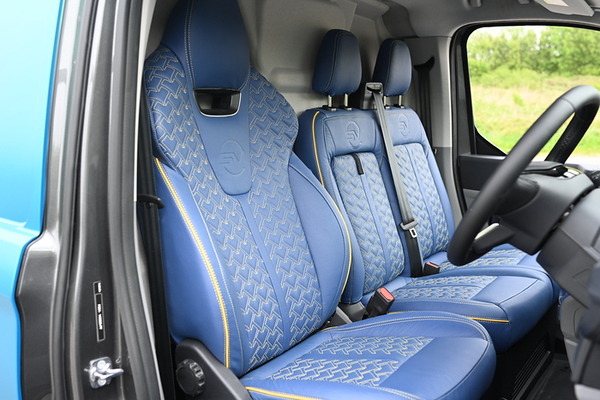
Beautiful interiors for relaxing drives: our leather upgrades increase your comfort and the van’s value.
Fancy an upgrade? Rent a van from £70 to £150 daily.
Collect the vehicle from Pencoed Swiss HQ. We sort the rest. Special deals for weekly rentals. Terms and conditions apply and mileage limitations.
Van upgrades have become increasingly popular among adventure enthusiasts and digital nomads seeking to transform their vehicles into dream machines. From simple modifications to complete overhauls, these upgrades allow individuals to customize their vans for comfort, functionality, and style. The growing trend of van life has sparked a surge in innovative accessories and modifications, making it easier than ever to create a personalized mobile living space.
This comprehensive guide explores essential interior upgrades, comfort enhancements, power systems, exterior modifications, and performance improvements. Readers will discover the best van upgrades for their specific needs, whether they own a Sprinter, Transit, or VW van. From practical gadgets to luxury items, this article covers a wide range of options to upgrade custom vans, including tips on finding van customization services near you. By the end, you’ll have the knowledge to turn your vehicle into the ultimate adventure companion or home on wheels.
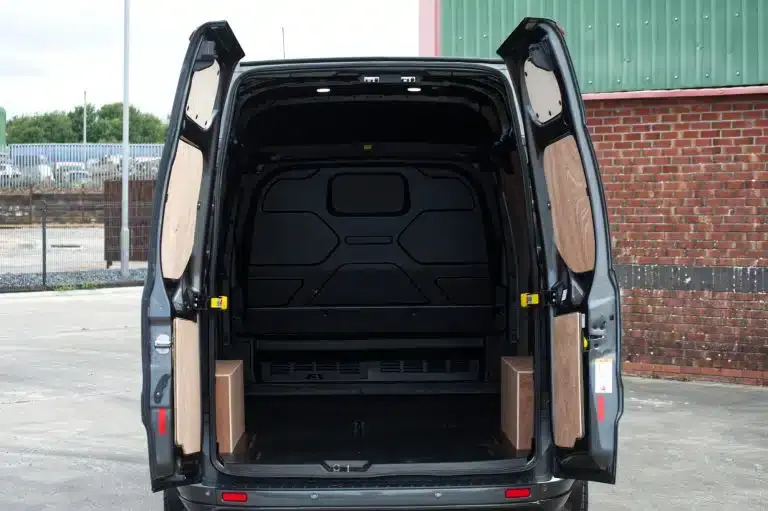
When transforming a van into a dream machine, essential interior upgrades play a crucial role in creating a comfortable and functional living space. These upgrades focus on three key areas: insulation, flooring, and storage solutions.
Proper insulation has an impact on temperature regulation, moisture control, and noise reduction in a camper van. It helps maintain a comfortable interior environment and protects against condensation, which can lead to rust and mold. There are several insulation options available for van upgrades:
Havelock Wool: This natural, environmentally friendly option has an R-value of 3.6 per inch. It’s easy to work with and can conform to oddly shaped spaces in the van. Havelock Wool also has the unique ability to absorb and release moisture, making it ideal for moisture mitigation.
3M Thinsulate: A synthetic insulation with an R-value of 3.8 per inch, Thinsulate comes in 60-inch wide rolls that can be cut to size. It’s moisture-resistant, durable, and has slight noise-insulating properties.
Lizard Skin: This spray-on insulation offers both sound control and ceramic insulation. It creates a thermal break throughout the van, preventing conduction and adhering well to hard-to-reach areas.
Low-E Insulation: Primarily a radiant barrier, Low-E insulation reflects radiant heat transfer. It’s particularly effective for window insulation but requires an air gap to function properly.
To maximize insulation effectiveness, it’s essential to address thermal bridging. This occurs when there’s a complete path of thermally conductive material from the outside to the inside of the van. Using a thermal break material, such as closed-cell foam or Lizard Skin, can help prevent this issue.
A properly installed floor has several critical functions beyond supporting feet. It prevents water infiltration, provides thermal and noise insulation, and serves as an anchor for cabinets. A typical van floor consists of four layers:
When choosing materials for the floor, consider using XPS foam with a rating higher than 150 (15 PSI) for the insulation layers. For the finish layer, large vinyl sheets are preferable to minimize seams and potential water infiltration points.
Efficient storage solutions are crucial in maximizing the limited space in a van. Here are some popular storage ideas:
Overhead Lockers: These fill awkward spaces and provide ample storage for books, toiletries, and miscellaneous items.
Bulkhead Storage: The area above the driver’s seat can be used for storing food and kitchenware.
Cupboards and Wardrobes: Essential for storing clothes and outdoor gear.
Storage Boxes: Can double as seating areas and offer spacious storage compartments.
Kitchen Units: A well-designed kitchen unit can house water tanks, garbage bins, a fridge, and additional storage.
Hanging Storage: Macrame nets and magnetic knife holders add style and function.
Secret Compartments: Provide secure hiding spots for valuables.
Shoe Storage: Installing racks near the entrance keeps the van tidy.
Roof Storage: If not used for solar panels, the roof can be fitted with racks or boxes.
Recessed Shelves: Help maintain an open feel while adding storage, especially in bathrooms.
By focusing on these essential interior upgrades, van enthusiasts can create a comfortable, functional, and personalized living space that meets their specific needs and preferences.
Transforming a van into a comfortable living space requires careful consideration of various elements. This section explores key aspects that contribute to enhancing the comfort and livability of a van, including seating options, sleeping arrangements, and lighting solutions.
When it comes to seating in a van, versatility and functionality are paramount. The choice of seating has an impact on both comfort and the overall usability of the space. Here are some options to consider:
Removable Seats: These allow for flexibility in the van’s layout. They can be installed or removed as needed, making it easier to accommodate different passenger configurations or create more space for other purposes.
Rock and Roll Beds: This popular option serves a dual purpose. During the day, it functions as a comfortable seating area, while at night, it can be converted into a bed. This type of seating is particularly useful for maximizing space in smaller vans.
Additional Seats: For those who frequently travel with family or friends, adding extra seats can be beneficial. However, it’s crucial to note that this process requires careful planning and professional installation. Simply screwing seats to the floor is not only illegal but also unsafe. Always consult with a reputable van conversion specialist to ensure that any additional seating meets safety standards and complies with local regulations.
Comfortable sleeping arrangements are essential for any van conversion. The choice of bed setup depends on factors such as the number of occupants and the available space. Here are some popular options:
Fixed Beds: These provide a permanent sleeping area and often allow for storage space underneath. They’re ideal for those who prioritize a dedicated sleeping space.
Convertible Beds: These can be transformed from seating areas during the day into beds at night, maximizing the use of limited space.
Bunk Beds: For families or groups, removable bunk beds can be an excellent solution. They can be installed when needed and removed to create more living space during the day.
Pop-Top Beds: Some vans, particularly VW Transporters, offer pop-top roofs with built-in beds. These provide additional sleeping space without permanently taking up room in the main living area.
Awnings: For extra sleeping capacity, awnings can be used to create additional space outside the van. Drive-away awnings, in particular, can significantly increase living space during longer trips.
For those traveling with young children, specialized solutions such as travel cots, toddler inflatable beds, or Sleepyheads can provide safe and comfortable sleeping arrangements.
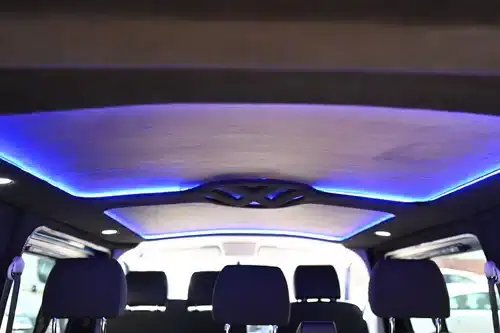
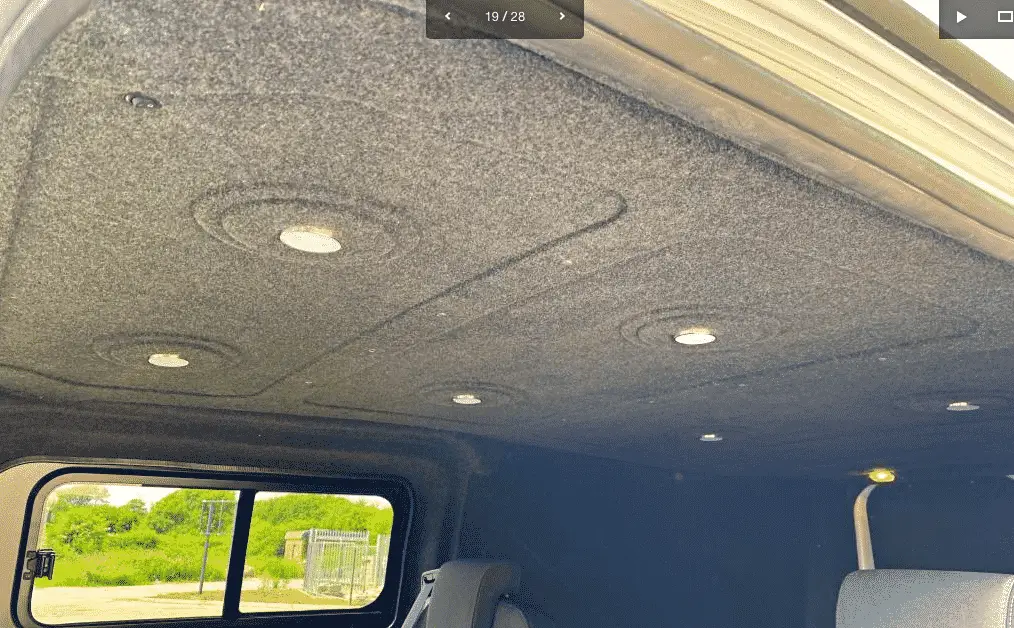
Proper lighting has a significant impact on the ambiance and functionality of a van’s interior. A well-thought-out lighting plan can transform a dim space into a bright and inviting environment. Here are some lighting options to consider:
Recessed Puck Lights: These 12V lights are popular due to their easy installation, comfortable light output, and low power draw. They come in both warm and cool options and various finishes. For a 14-foot living space, 6–10 lights (divided into two dimmable zones of 4–5 each) can provide ample illumination.
LED Strip Lights: These add ambiance and can be used for accent lighting. They’re particularly effective when placed under cabinets or inside ceiling slats.
Gooseneck Reading Lights: These flexible lights are perfect for nighttime reading and can often double as USB charging points.
Dome Lights: These classic fixtures provide diffused lighting and can eliminate the need for multiple recessed lights.
Motion-Activated Lights: These can be useful for cupboards and storage areas, adding a touch of luxury to the van experience.
When choosing lighting, consider the color temperature. Warm light (2000K– 3000K) creates a cozy atmosphere, while cool light (3100K–4500K) is often used in task-oriented areas like bathrooms. Daylight (above 4600K) closely mimics natural sunlight.
Dimmer switches are a valuable addition, allowing control over light intensity and power consumption. This flexibility helps create the right ambiance for different times of day while conserving energy when full brightness isn’t necessary.
A well-designed power and electrical system has a significant impact on the comfort and functionality of a camper van. This section explores three crucial components: solar panels, batteries, and inverters.
Solar energy presents an excellent and economical choice for making van life more comfortable. By installing solar panels on the roof, van owners can capture free renewable energy from the sun, reducing reliance on external power sources. This approach enhances mobility and promotes environmental consciousness.
When selecting solar panels for a camper van, two main types are available:
Monocrystalline Solar Panels: These are the most efficient due to their use of a single, pure piece of silicon. They are smaller, lighter, and more reliable than polycrystalline panels, making them ideal for campervans with limited roof space.
Polycrystalline Solar Panels: While less efficient and more affordable, these panels require larger installation space and increased weight, making them less suitable for campervans.
For optimal performance, van owners should consider using anti-reflective coatings on their solar panels and clean them regularly to remove dust and debris. Professional installation can also yield maximum output.
Selecting the right battery type has a significant impact on a camper van’s power system. Two common options are AGM (Absorbed Glass Mat) and Lithium batteries.
Lithium batteries offer several advantages over AGM batteries:
Usable Capacity: Lithium batteries can be discharged to 100% of their capacity without compromising lifespan, while AGM batteries should not be discharged below 50%.
Weight: Lithium batteries are significantly lighter than AGM batteries, providing more usable amp-hours for less weight.
Lifespan: Lithium batteries typically last 10–15 years, compared to 3–5 years for AGM batteries.
Warranty: Many lithium batteries come with a 10-year warranty, while AGM batteries usually have a 1–2 year warranty.
However, AGM batteries handle cold temperatures better than lithium batteries, which may require insulated battery boxes or heating blankets in freezing conditions.
To maximize battery longevity, it’s essential to practice efficient usage habits. This includes turning off appliances when not in use, monitoring power levels, and ensuring optimal storage temperatures. For those with lithium batteries, a Battery Management System (BMS) helps prevent overcharging, over-discharging, or overheating.
An inverter converts the low-voltage DC electricity from leisure batteries (usually 12V) into high-voltage AC electricity (230V in Europe, 120V in North America). This allows the use of standard household appliances in a camper van.
When choosing an inverter, consider the following factors:
Power Rating: Inverters come in various wattages (e.g., 500W, 1200W, 3000W). To determine the appropriate size, calculate the total power draw of all appliances that might be used simultaneously.
Pure Sine Wave vs. Modified Sine Wave: Pure sine wave inverters produce cleaner electricity, closely matching the actual sine wave of AC voltage. They are essential for sensitive devices like laptops and audio systems.
Surge Capacity: Inverters should handle sudden power surges from appliances like refrigerators or power tools during startup.
Efficiency: Inverters typically operate most efficiently at 50–75% of their maximum capacity.
Power Factor: Consider the power factor of devices when sizing the inverter, as some appliances may require more power than their wattage rating suggests.
By carefully considering these factors and selecting high-quality components, van owners can create a reliable and efficient power system that supports their desired lifestyle on the road.
Exterior modifications have a significant impact on the overall appearance and functionality of a van. These upgrades not only enhance the vehicle’s aesthetics but also improve its practicality for various purposes. This section explores three key areas of exterior modifications: paint and wraps, roof racks, and awnings.
Vehicle wraps have become an increasingly popular choice for changing the appearance of vans, cars, and trucks. A vehicle wrap is a large vinyl graphic or decal applied directly to the surface of the vehicle. These wraps offer a wide range of colors, finishes, and designs, providing endless customization possibilities.
When selecting a vehicle wrap, several factors should be considered:
Before applying a wrap, it’s essential to properly prepare the vehicle’s surface. This process includes thorough cleaning, inspecting for damage, and removing hardware. While DIY installation is possible, it’s highly recommended to enlist the help of a professional installer to ensure a flawless finish.
To maintain the wrap and prolong its lifespan, van owners should follow these tips:
Roof racks have a significant impact on a van’s functionality and storage capacity. They provide additional space for carrying materials, equipment, and accessories. Many van lifers opt for some level of roof rack, though the decision ultimately depends on individual needs and preferences.
Pros of installing a roof rack:
Cons of installing a roof rack:
Popular roof rack options include:
Awnings have a significant impact on extending a van’s living space and providing shelter from the elements. Drive-away awnings, in particular, are essentially tents with a connecting panel designed to fit over the van’s living space door.
When selecting an awning, it’s crucial to consider the van’s height.
Most camper awnings come equipped with a pre-attached 6mm Kador strip designed to slide into an awning rail. Installation generally includes:
For vans with different groove sizes, such as Fiamma F45s with a 4mm groove, a "4mm – 6mm Fixing Kit" may be required. Awnings also come with Velcro straps for roof bars and sleeves for pole-and-clamp kits.
By carefully considering these exterior modifications, van owners can significantly enhance their vehicle’s functionality, aesthetics, and overall livability.
Enhancing the performance and handling of a van has a significant impact on its overall driving experience. These upgrades can transform a standard vehicle into a more capable and enjoyable machine, especially for those who frequently travel on diverse terrains or carry heavy loads.
Suspension upgrades have a substantial impact on a van’s handling and comfort. For many modern vans, upgrading the rear suspension is not always necessary, as manufacturers have improved their designs. However, rear suspension products are still available for those who frequently tow or experience sagging rear axles when fully loaded.
Before undertaking any suspension modifications, van owners should contact their insurance providers. While spring and damper changes for improved performance typically do not increase premiums, some insurers may have specific policies regarding such modifications.
It’s crucial to understand that upgraded springs and dampers do not increase the axle bearing limit or the static load tolerance on the hitch. The primary aim of these upgrades is to keep the vehicle level, particularly important for front-wheel-drive vans where reduced load on the front wheels can lead to a loss of traction.
Several suspension upgrade options are available:
Selecting the right wheels and tires has a crucial impact on a van’s performance and handling. All-terrain tires, in particular, offer several benefits for van owners who frequently drive on diverse surfaces.
They provide excellent traction in slippery conditions—ideal for camping, grassy fields, or muddy lanes. Their strong sidewalls improve shock absorption from potholes and bumps, enhancing ride comfort. Many models come with reinforced sidewalls for harsh conditions.
When choosing new tires, consider the following factors:
By carefully considering these performance and handling improvements, van owners can significantly enhance their vehicle’s capabilities, making it more suitable for various driving conditions and personal needs.
The world of van upgrades offers a wealth of possibilities to transform ordinary vehicles into personalized dream machines. From essential interior modifications to exterior enhancements and performance improvements, van owners have numerous options to customize their mobile living spaces. These upgrades have a significant influence on comfort, functionality, and style, allowing individuals to create unique vehicles that cater to their specific needs and preferences.
As the van life trend continues to grow, so does the availability of innovative accessories and modifications. This guide provides a comprehensive overview to help readers navigate the vast landscape of van upgrades. Whether you’re a weekend warrior or a full-time nomad, the right combination of upgrades can turn your van into the ultimate adventure companion or home on wheels.
With careful planning and thoughtful modifications, van enthusiasts can create a mobile sanctuary that reflects their lifestyle and supports their journeys on the open road.
Q: What are the steps involved in converting a van into a camper?
A: Converting a van into a camper involves a sequential process starting with stripping and cleaning the van, installing windows and ventilation, adding a roof, insulating and heating the van, setting up electric and gas systems, installing plumbing and water systems, fitting lights, and finally adding beds and seating.
Q: Which vans are most suitable for camper modifications?
A: The best vans for camper conversions include the Fiat Ducato, Peugeot Boxer, Citroën Relay, VW Transporter, and Ford Transit Custom. Models like the Benimar Benivan 144 on a Fiat Ducato, Joa Camp 60G on a Citroën Relay, and the Ford Nugget on a Ford Transit Custom are also highly recommended.
Don’t just take our word for it. We’re rated at 4.9/5 on independent reviews website Trustpilot from over 34,886 genuine customer reviews
Swiss vans are a fantastic company to deal with .From the first meeting we had they delivered everything that was asked of them , my transporter was fitted with everything I asked for with expertise as my expectations was met to the letter .if you are thinking of getting
David Jones9 months ago
Alex was a pleasure to deal with, very down to earth and made things very simple for me. Nothing was too much trouble and above all, once the deal was made he still picks up the phone or calls me back straight away. Great aftersale too!
Anthony Dixon1 year ago
Sam at Swiss vans was excellent from start to finish worked with me to select the right van and the right package to suit my business. Would highly recommend and will certainly be working with them again in the future
Rob Dorkin11 months ago
Pop in your details and the team will reply in minutes.