How to Fit a Roof Rack on a Citroen Berlingo: Step-by-Step Guide
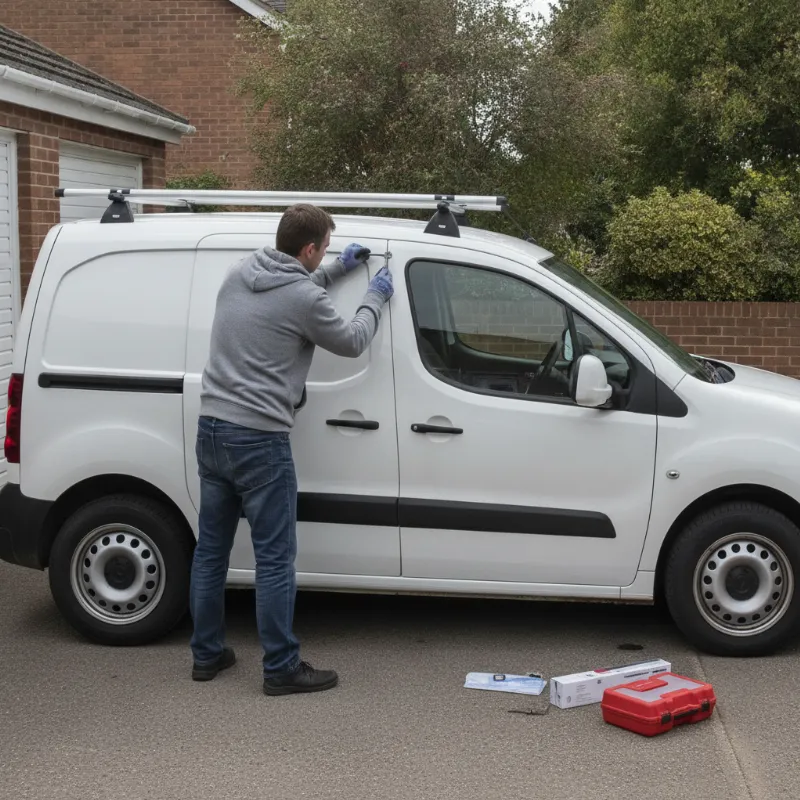
Before you start: tools, safety and checking your Berlingo's roof type
Fitting a roof rack to a Citroen Berlingo is one of the most useful upgrades you can make, whether you use the van for trade work, camping gear or bulky family loads. Before you touch a single bolt, though, it pays to spend ten minutes understanding what you're working with. The Berlingo has been sold in several generations since 1996, and the roof design has changed noticeably across each one — so a rack that bolts straight onto a 2020 model may not suit a 2008 van at all.
Park the van on level ground, ideally somewhere sheltered from wind and rain, and give the roof a proper wipe down. A clean, dry surface makes it far easier to spot fixing points, existing seals and any signs of corrosion that could cause you problems later. If you're working alone, have a stable step or small platform to hand — trying to balance a full crossbar assembly overhead is how mistakes happen.
Tools and parts you'll need
Most Berlingo roof rack kits are designed to be fitted with basic hand tools, but the exact list depends on the system you've bought. As a minimum, have a torque wrench with the range specified in your kit instructions (typically 4–8 Nm for plastic covers and 6–10 Nm for crossbar bolts), a set of metric Allen keys, a Phillips screwdriver, a soft cloth and some isopropyl alcohol or panel cleaner. Masking tape is handy for marking fitting positions without scratching paint.
From the kit itself, check you have the correct number of feet (usually four), two crossbars sized for the Berlingo's width, the fixing hardware pack, any rubber pads or gaskets, end caps and — if the rack is lockable — the keys. Lay everything out on a clean sheet before you begin so you can spot missing parts before you're halfway up a ladder.
Identifying fixed points vs rain gutter vs bare roof on your Berlingo
Citroen Berlingos come with three main roof configurations. Later vans (2018 onwards, Berlingo Van and Multispace/Rifter) and many Enterprise trims have factory fixed points — small threaded inserts hidden beneath plastic covers along the roof edge. Older shape Berlingos (roughly 2008–2018) often have a smooth "bare roof" designed for clamp-style feet that grip the door frame. Very early first-generation Berlingos and some commercial variants have rain gutters, which take a different foot design again.
Open the front and side doors and look along the top edge of the door aperture. If you can see small removable covers on the roof itself, you have fixed points. If the roof is smooth all the way and the door seal runs cleanly along a lipped frame, you have a bare roof suited to clamp feet. Getting this identification right is the single most important thing you'll do — the wrong foot type will either not fit or, worse, will fit poorly and work loose on the motorway.
Choosing the right roof rack for a Citroen Berlingo
Once you know your roof type, choosing a rack becomes much simpler. The main decision is between a single pair of crossbars (fine for light loads, kayaks or a single ladder) and a full commercial roof rack platform with load stops and a rear roller (better for tradespeople carrying multiple ladders, pipes or long timber). Panel van owners tend to go for the platform style; Multispace and Rifter drivers usually just need crossbars.
Approved roof rack systems for Berlingo panel vans and Multispace
Major brands including Thule, Rhino-Rack, Van Guard and Cruz all produce Berlingo-specific fitting kits. The kit reference is the critical part — even within one brand, the fitting kit number changes between roof types and generations. Always cross-check the manufacturer's vehicle lookup against your registration or VIN before ordering. For commercial use, Van Guard's ULTI Rack and Rhino's KammRack are popular because they're TÜV-tested to specific load figures and come with the correct Berlingo feet in the box.
If your van is still under warranty, it's worth checking that the rack you choose is compatible with Citroen's own fitting guidance. Non-approved systems won't necessarily invalidate the warranty, but they can cause issues if the roof skin deforms or leaks around the fixings.
Weight limits and load ratings to check first
Every Berlingo has a maximum roof load stated in the owner's handbook, and it's lower than most people expect — typically 100kg for the current model and as little as 80kg on some earlier vans. That figure includes the weight of the rack itself. So if your rack weighs 25kg, you only have 75kg of usable load capacity. Two roofing ladders and a bundle of battens will easily hit that limit.
Also check the dynamic load rating of the rack (the safe load while driving) versus the static load rating (what it can hold when parked, which matters if you plan to sleep in a roof tent). The lower of the vehicle limit and the rack limit is the figure you must stick to. Exceeding it risks damaging the roof, affecting handling and — in the event of an accident — potentially invalidating your insurance.
Step-by-step: how to fit a roof rack on a Citroen Berlingo
With the right kit selected and your tools laid out, the actual fitting process usually takes between 30 and 60 minutes for a straightforward crossbar set, or up to two hours for a full commercial platform. Work methodically and don't be tempted to skip the torque check at the end.
Step 1 — Prepare the roof and unpack the kit
Give the roof a final clean with panel cleaner, paying particular attention to the areas where the feet will sit. Any grit trapped under a rubber pad can eventually scuff paint and let water in. Read the kit instructions all the way through before you start — it sounds obvious, but manufacturers sometimes specify unusual sequences (fitting one bolt loosely before tightening another, for example) that are easy to miss on a second glance.
Lay the crossbars on a soft blanket on the ground and assemble the feet loosely onto them, following the marked front/rear orientation. Most systems have arrows or "F" markings — don't ignore them.
Step 2 — Position the feet at the correct fitting points
For fixed-point Berlingos, pop off the plastic covers along the roof edge to reveal the threaded inserts. There will usually be four per side; your kit will tell you which pair to use. For bare-roof vans, open the front and rear side doors and hook the clamp portion of each foot over the inner door frame at the marked measurement from the front. Get someone to hold the crossbar level while you check both sides are equidistant from the windscreen — a tape measure is your friend here.
Lift the assembled crossbar onto the roof gently. Don't drag it across the paint. Rest it in position and check the feet sit flush against the roof or door frame with no gaps.
Step 3 — Secure the crossbars and torque to spec
Start the fixing bolts by hand to make sure the threads engage cleanly. Once all four feet are hand-tight, work around them in a diagonal pattern, tightening each a little at a time so the crossbar pulls down evenly. Finish with a torque wrench set to the value specified in the instructions — typically 6 Nm for plastic-clad feet and up to 10 Nm for metal commercial feet. Do not over-tighten. Distorting a foot or crushing a rubber pad is a common DIY mistake that leads to whistling at motorway speeds and, eventually, water ingress.
Step 4 — Fit end caps, lock and final safety check
Clip the plastic end caps onto the crossbars and, if fitted, insert the lock cores and test them with the key in both directions. Give the whole rack a firm shake side-to-side and front-to-back. There should be no movement at the feet and no creaking from the roof skin. Walk around the van and look along each crossbar from the front to check they're parallel and level.
Finally, take the van for a short, gentle drive — ideally including a section at 40–50 mph — and then re-check every bolt with the torque wrench. It's normal for fixings to settle slightly on the first drive, and this quick re-torque is what stops problems developing later.
Loading your Berlingo roof rack safely
A well-fitted rack is only half the job — how you load it matters just as much for safety, fuel economy and the life of your van.
Securing loads, ladders and pipe tubes
Distribute weight evenly across both crossbars and keep the heaviest items centred over the middle of the roof rather than at the ends. Use proper ratchet straps rated for the load, not bungee cords, and always run at least two straps around each item — one at the front and one at the rear. Ladders should be laid flat with the feet facing rearward and secured at three points minimum. Pipe tubes and conduits fitted to the side of a commercial rack must be capped at both ends and, if they extend more than one metre beyond the rear of the van, marked with a high-visibility board by law.
Give every strap a final tug after loading, and again after the first few miles of driving. Loose loads are one of the most common causes of motorway incidents involving vans.
Impact on fuel economy, height and headroom
A loaded roof rack can knock 10–15% off your Berlingo's fuel economy, and an empty rack still costs you a couple of MPG through added drag. If you only use the rack occasionally, consider removing it between jobs — most systems come off in under ten minutes once you've done it a few times.
Don't forget about height. A standard Berlingo is around 1.86m tall; adding a rack and a ladder can push you close to 2.3m. Note the new height somewhere visible in the cab — a sticker on the sun visor is traditional — and check it before every multi-storey car park, drive-through or low bridge.
Maintenance, MOT and insurance considerations
Roof racks need very little maintenance, but a quick monthly check of the fixings pays dividends. Look for corrosion around the feet, check the rubber pads haven't perished and give the locks a spray of dry lubricant every six months to stop them seizing. On bare-roof clamp systems, inspect the paint under the feet twice a year — any scratches should be touched up before rust takes hold.
For the MOT, a securely fitted rack in good condition is not a fail item, but a loose or damaged rack that obstructs vision or presents a sharp edge can be. Your insurer should be told that a rack is fitted, particularly if it's a permanent commercial installation, as it can affect both premiums and the vehicle's classified height. Failing to declare modifications is a common reason claims get rejected, so a quick email to your broker is time well spent.
Common mistakes and troubleshooting
The problems people run into after fitting a Berlingo roof rack are almost always down to one of a handful of causes. Wind noise or whistling at speed usually means a foot isn't sitting flush or a crossbar has been fitted the wrong way round — many aerodynamic bars are directional. Water leaking into the cabin after fitting is almost always a sign that a fixed-point cover wasn't reseated correctly or a foot has been over-tightened, deforming the seal.
If the rack creaks when you drive, re-torque all four feet and check that no grit is trapped between the pad and the roof. If a foot won't sit level, double-check you have the right fitting kit for your Berlingo's exact year and roof type — a surprising number of returned kits turn out to be the correct brand but the wrong reference number. And if in doubt at any stage, stop and ring the manufacturer's technical line rather than forcing anything. A £300 rack fitted badly can cause thousands of pounds of damage to a van roof.
FAQs
How do I fit a roof rack on a Citroen Berlingo?
Identify your Berlingo's roof type (fixed points, bare roof or rain gutter), buy the matching manufacturer-specific fitting kit, then clean the roof, position the feet at the marked fitting points, secure the crossbars with a torque wrench to the specified figure (usually 6–10 Nm), fit end caps and locks, and re-check all bolts after a short test drive. The whole job typically takes 30–60 minutes for a basic crossbar set.
What is the maximum roof load for a Citroen Berlingo?
Most modern Berlingos have a maximum roof load of 100kg, while some earlier models are limited to 80kg. This figure includes the weight of the rack itself, so subtract the rack's own weight to work out your usable capacity. Always check your specific vehicle's handbook, as limits vary by generation and trim.
Can I fit a roof rack to a Berlingo with a bare roof?
Yes. Bare-roof Berlingos use clamp-style feet that grip the inner door frame when the front and rear side doors are opened. You'll need a fitting kit specifically designed for a bare-roof Berlingo of your model year — the same brand of rack will use a different kit reference for fixed-point vans.
Do I need to tell my insurer about a roof rack?
Yes, it's strongly advised. A roof rack counts as a vehicle modification, particularly if permanently fitted for commercial use, and can affect both your premium and the van's overall height. Failing to declare it could give your insurer grounds to reject a claim, so a quick call or email to your broker is worthwhile.
Will fitting a roof rack affect my Berlingo's fuel economy?
Yes. An empty rack usually costs 1–2 MPG through added drag, and a fully loaded rack can reduce fuel economy by 10–15%. If you only use the rack occasionally, removing it between jobs is the easiest way to claw back that efficiency — most modern systems can be removed in under ten minutes once you're familiar with them.