How to Change Rear Brake Pads on a Nissan Primastar: A Step-by-Step DIY Guide
Before You Start: Tools, Parts and Safety
Changing the rear brake pads on a Nissan Primastar is a job most confident DIYers can tackle in a couple of hours on the driveway, provided you approach it methodically. The Primastar shares much of its running gear with the Renault Trafic and Vauxhall Vivaro of the same generation, which means parts availability is excellent and the procedure is well documented. That said, brakes are the single most important safety system on your van, so before you undo a single bolt it pays to get organised, gather everything you need, and understand what you're taking on.
This guide walks you through the full process from the first wheel nut to the final test drive. Read it all the way through before you begin so you know what's coming at each stage — there's nothing worse than realising you're missing a tool halfway through with the caliper hanging off.
Tools and Materials Checklist
You'll need a solid trolley jack rated for at least the kerb weight of a loaded Primastar (around two tonnes as a minimum), a pair of axle stands, and a wheel brace or 22mm socket to suit the wheel nuts. For the caliper work itself, gather a 13mm and 17mm spanner and socket set, a T30 or T40 Torx bit (depending on year), a large flat-blade screwdriver or pry bar, a G-clamp or dedicated piston rewind tool, and a torque wrench that covers roughly 30–110 Nm.
On the consumables side, buy a set of genuine or reputable OE-equivalent rear brake pads (Brembo, Ferodo, TRW and Textar are all sensible choices), a can of brake cleaner, copper grease or ceramic brake grease for the pad backs and slider pins, and a small tub of rubber-safe caliper slider grease. Have some clean rags and a length of wire or a bungee cord ready to support the caliper once it's off the disc.
Safety Precautions and Workshop Setup
Park the van on flat, level ground — ideally concrete rather than tarmac, which can soften under jack pressure on a hot day. Engage the handbrake firmly, chock the front wheels front and back, and put the gearbox in first gear. Never rely on the trolley jack alone; always transfer the weight onto properly rated axle stands before you go anywhere near a wheel. Wear safety glasses when working near brake dust, which contains materials you really don't want in your eyes or lungs, and keep brake fluid well away from paintwork as it strips lacquer on contact.
How to Change Rear Brake Pads on a Nissan Primastar: Step-by-Step
With everything laid out and the van secure, you're ready to start the job proper. Work on one side at a time and keep the opposite wheel on the ground until you've finished — it makes the van far more stable and gives you a reference if you're unsure how something goes back together.
Step 1: Loosen Wheel Nuts and Jack the Van
Before lifting the van, crack the wheel nuts loose by about half a turn while the wheel is still on the ground. Trying to break them free with the wheel spinning in the air is difficult and unsafe. Once loose, position the trolley jack under the manufacturer's designated rear jacking point — consult your owner's handbook, as jacking on the wrong part of the subframe can bend sheet metal. Lift the van until the tyre is clear of the ground, then slide an axle stand under a strong chassis point and lower the van gently onto it.
Step 2: Remove the Rear Wheel
Fully unscrew the wheel nuts and lift the wheel away. Rear van wheels can be heavy, so bend your knees and pull it towards you rather than lifting from an awkward angle. Lay the wheel flat under the van's sill as an extra safety measure — if the worst happens and the axle stand fails, the wheel will stop the van hitting the ground.
Step 3: Detach the Brake Caliper
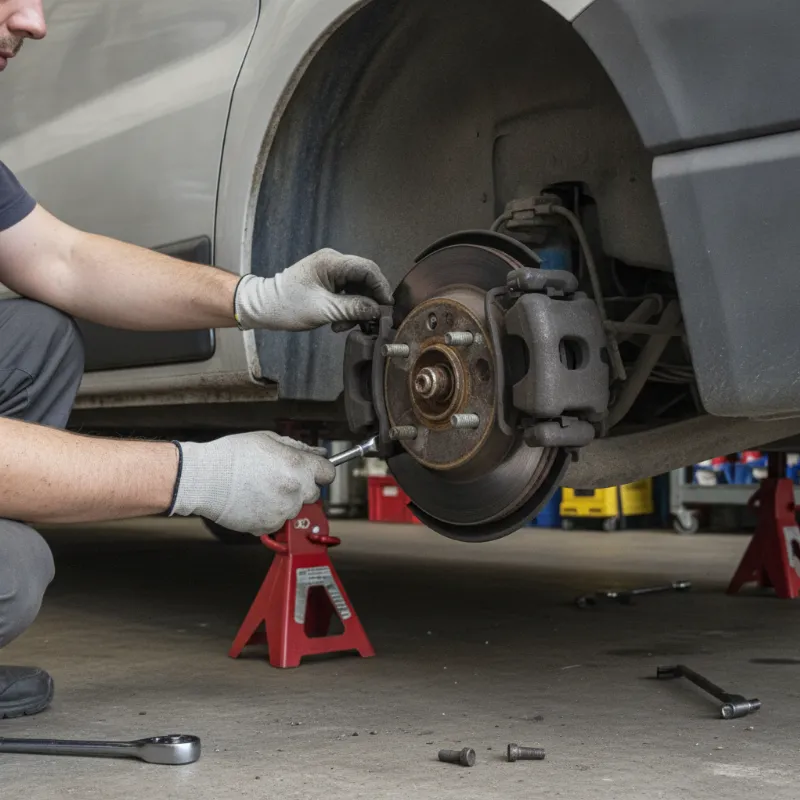
Behind the disc you'll see the caliper assembly. Two guide bolts (usually 13mm on the head, sometimes with a Torx socket) hold the caliper body to the carrier bracket. Undo both bolts fully and slide the caliper off the disc. Do not let it dangle by the flexible brake hose — support it with wire or a bungee cord looped over a suspension component. Stressing the hose can cause internal damage that only shows up later as a soft pedal or a leak.
Step 4: Remove the Old Brake Pads
With the caliper out of the way, the old pads will lift straight out of the carrier bracket. Note the position of any anti-rattle shims or clips and take a photo before you disturb them — they must go back in the same orientation. Inspect the disc surface while it's exposed: deep scoring, a pronounced lip on the outer edge, or blueing from overheating are all signs the discs need replacing at the same time.
Step 5: Compress the Caliper Piston
New pads are much thicker than worn ones, so the caliper piston needs winding back into its bore before the caliper will fit over them. On the Primastar's rear calipers, the piston is threaded and must be rotated clockwise as you push it in — a G-clamp alone won't work and will damage the piston seal. Use a proper piston rewind tool with the correct adaptor. Before winding, open the brake fluid reservoir cap under the bonnet and syphon a little fluid out if it's close to the maximum mark, otherwise pushing the piston back can overflow the reservoir.
Step 6: Fit the New Brake Pads
Apply a thin smear of copper or ceramic grease to the metal backing plate of each new pad — never to the friction surface. Slot the pads into the carrier bracket the same way the old ones came out, making sure any wear-indicator clip is on the correct side (usually the inner pad). If your kit includes new anti-rattle springs or shims, fit them now.
Step 7: Refit the Caliper and Wheel
Check the slider pins move freely in and out of the carrier — if they're stiff or dry, pull them out, clean them, regrease with rubber-safe slider grease and refit. Slide the caliper back over the new pads and thread the guide bolts in by hand first to avoid cross-threading. Torque them to the manufacturer's spec (typically around 35 Nm for the caliper guide bolts, but confirm for your specific year). Refit the wheel, nip the nuts up in a star pattern, lower the van, and torque the wheel nuts to 110 Nm.
Step 8: Bed the Brakes In
Before you drive off, pump the brake pedal several times with the engine off until it feels firm — the first press will go straight to the floor because the piston is fully retracted. Top the brake fluid reservoir back up to the max mark if needed. New pads need bedding in to transfer a thin, even layer of friction material onto the disc: find a quiet road and perform around ten moderate stops from 30 mph, then a couple of firmer stops from 50 mph, avoiding coming to a complete standstill where possible so the brakes can cool evenly. Avoid heavy braking for the first 100 miles or so.
Dedicated Section: Nissan Primastar 1.9 dCi 100PS SE 2700 SWB Panel Van Rear Brake Pad Notes
The 1.9 dCi 100PS SE in 2700 short-wheelbase panel van form was one of the most common Primastar variants on UK roads, and there are a few specifics worth flagging if that's the van you're working on.
Pad Specification and Part Numbers for the 1.9 dCi 100PS SE 2700 SWB
This variant runs solid rear discs of 280mm diameter with a corresponding pad set that's shared across a huge number of Renault Trafic II and Vauxhall Vivaro A vans of the same era. Common OE cross-reference numbers to look for are Nissan 44060-00QAD, Renault 77 01 209 812 and Vauxhall/Opel 93198461 — any reputable factor will interpret those to the aftermarket equivalent. Textar 2392201, Brembo P59041 and Ferodo FDB1618 are all correct fitments. Always double-check by measuring the old pad against the new one before you commit to fitting.
Torque Settings and Model-Specific Quirks
For the 1.9 dCi 2700 SWB, torque the caliper guide bolts to 35 Nm, the caliper carrier bracket bolts (if you've removed them) to 105 Nm, and the wheel nuts to 110 Nm. One quirk of this particular model is that the handbrake mechanism operates through the same rear caliper, so after winding the piston back you'll want to apply and release the handbrake a few times once everything's reassembled to let the self-adjuster take up the slack. If the handbrake feels long after the job, try this before assuming anything is wrong.
Common Problems and Troubleshooting
Even a well-planned brake job can throw up surprises. Two issues come up regularly on Primastars, and knowing how to handle them saves a lot of frustration.
Seized Caliper Slider Pins
On vans that have covered high mileage or spent winters on salted roads, the slider pins often seize in their bores. You'll notice it when one pad has worn dramatically more than the other, or when the caliper won't slide freely off the disc. Free them by removing the pins entirely, cleaning them back to bare metal with wire wool and brake cleaner, and inspecting the rubber boots for splits. Replace any damaged boots — they're cheap — and regrease generously with a proper high-temperature slider grease. If a pin is badly pitted, replace it; a sticking pin will chew through your new pads in months.
Brake Warning Light Stays On After Pad Change
If the brake warning light stays illuminated after you've finished, first check the obvious: is the handbrake fully released, and is the fluid reservoir topped up to the max? If both are fine, check that the wear-sensor connector (if fitted) is properly clipped back into the loom. On some Primastars the light will also stay on briefly while the ABS system self-checks — a short drive should extinguish it. If it persists beyond that, plug in an OBD reader and check for stored codes before driving further.
When to Call a Professional Instead
DIY brake work is entirely achievable, but there are situations where the sensible call is to hand the job over to a qualified mechanic. If you find a leaking caliper piston, a damaged brake hose, discs that are below minimum thickness, or seized components you can't free with reasonable effort, stop and get it looked at. The same goes if you're not confident bleeding the system or if the pedal still feels spongy after the job — trapped air in the hydraulics is dangerous and needs proper diagnosis. There's no shame in it: a garage can complete an axle set of rear pads in under an hour, and you'll drive away knowing the work is guaranteed.
Looking to Upgrade? Browse Our Nissan Primastar Stock
If your current Primastar is starting to feel like it needs more work than it's worth — brakes today, clutch next month, injectors the month after — it might be time to consider a newer van. We regularly stock a range of Nissan Primastars and their close cousins from Renault and Vauxhall, all HPI-checked, workshop-prepared and ready to earn their keep. Whether you're after another short-wheelbase 2700 for city work or you're stepping up to a long-wheelbase crew van, get in touch and we'll help you find the right one. Part exchange welcome, finance available subject to status.
FAQs
How do I change the rear brake pads on a Nissan Primastar?
Chock the front wheels, loosen the rear wheel nuts, then jack the van and secure it on axle stands. Remove the wheel, unbolt the caliper guide bolts (usually 13mm), lift the caliper clear and support it — don't let it hang on the hose. Slide out the old pads, wind the caliper piston back clockwise using a rewind tool, fit the new pads with a smear of copper grease on the backing plates, refit the caliper and torque the bolts to around 35 Nm. Refit the wheel, torque the nuts to 110 Nm, pump the pedal until firm, top up the brake fluid and bed the new pads in with a series of moderate stops.
How long do rear brake pads last on a Nissan Primastar?
Rear pads on a Primastar typically last between 40,000 and 60,000 miles depending on load, driving style and terrain. Vans used mostly for motorway work will see the pads last longer than those doing stop-start urban delivery routes. Check the pad thickness at every service — anything below 3mm of friction material means it's time for a change.
Do I need to replace the rear discs at the same time as the pads?
Not always, but inspect them carefully. If the discs have deep scoring, a pronounced lip on the outer edge, signs of overheating (blue tinting), or they're below the minimum thickness stamped on the hub, replace them. As a general rule, discs last through two sets of pads, so if this is your second pad change on the same discs it's worth doing both together.
Why won't my caliper piston push back in?
The rear caliper pistons on a Primastar are threaded and have to be wound back clockwise, not just pushed. A standard G-clamp will damage the piston seal. Use a proper caliper rewind tool with the correct adaptor for the two indents on the piston face. If it still won't turn, the piston may be seized in the bore and the caliper will need overhauling or replacing.
Do I need to bleed the brakes after changing the pads?
No, bleeding isn't normally required if you've only changed the pads and haven't disconnected any hydraulic lines. However, it's good practice to open the reservoir cap before winding the piston back to avoid overflowing the fluid, and to top up to the max mark once you're finished. If the pedal feels spongy after the job, that suggests air has entered the system and bleeding will be necessary.