![]() Call us on 01656 674620
Call us on 01656 674620
![]() Call us on 01656 674620
Call us on 01656 674620
We fit bodykits. We do it day in day out 5 day sa week. As well as selling kits on our own vans we are happy to book in conversion work.
Drop us a line. We have everything you could possibly require to transform your car or van.
From renting you a vehicle while its in. To dropping you off at the railway station while you wait. Order a month or two in advance to give us a change to get the kit togther.

Van bodykits have become increasingly popular among vehicle enthusiasts and commercial van owners alike. These aftermarket modifications offer a way to enhance the appearance and functionality of vans, ranging from the Transit Custom to the Vauxhall Astra. Van bodykit manufacturers have developed a wide array of options, including Transit Custom rear spoilers and the Predator range, to cater to different tastes and needs. This guide delves into the world of van bodykits, covering various types available for different models such as the Ford Transit, Sprinter, and Citroen Despatch. It explores key factors to think about when selecting a bodykit, highlights top brands in the industry, and provides insights on installation and maintenance. Whether you’re looking to upgrade a Transit Custom or transform an A-Team van, this comprehensive overview aims to help you make an informed decision about the best van bodykit for your vehicle.
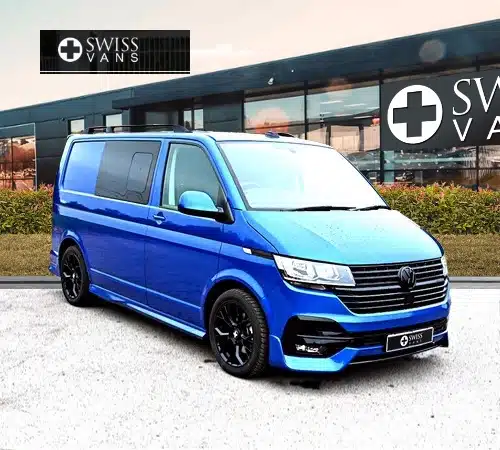
Van bodykits come in various styles and configurations, each designed to enhance the appearance and functionality of different van models. These kits can transform the look of vehicles such as the Ford Transit Custom, VW Transporter, and Mercedes Vito, among others. Let’s explore the main types of van bodykits available in the market.
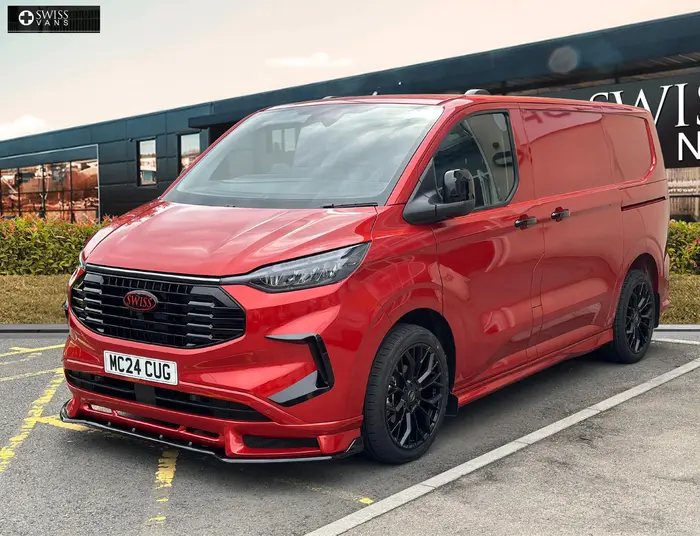
Full body kits offer a comprehensive transformation for vans. The Predator range, for instance, provides premium body kits for the Transit Custom van. These kits feature a two-way colour scheme and are pre-painted to match Ford’s OE colour codes. They’re available for both long wheelbase (LWB) and short wheelbase (SWB) Transit Custom vans, including double cab models. Full body kits typically include front splitters, side skirts, and rear spoilers, creating a cohesive and sporty look.
Front splitters are popular additions that give vans a more aggressive appearance. For example, the VS Sport front splitter for the Transit Custom is made from high-quality fibreglass and includes black mesh for the two lower openings. These splitters can significantly change the van’s front-end look, providing a sportier and more aerodynamic appearance.
Side skirts are designed to give vans a lower, more grounded look. High-quality fibreglass side skirts, like those offered by Vanstyle, can make a van stand out with their sporty and aggressive appearance. They’re available for both SWB and LWB models and are typically supplied primed, ready for painting to match the vehicle’s colour.
Rear spoilers are among the most popular van bodykit components. They’re available for various models, including the Ford Transit, Transit Custom, Mercedes Vito, and VW Transporter. Rear spoilers can be fitted to vans with tailgates or twin rear doors. For instance, the twin rear spoiler for Vivaro, Trafic, and Primastar vans has been well-received by owners. These spoilers are often supplied in a primer finish, ready for painting, and can be bonded into position without drilling.
When selecting a van bodykit, several key factors come into play. These considerations help ensure that the chosen kit aligns with the owner’s goals, budget, and vehicle specifications.
The first step is to identify the specific make and model of the van. Different bodykits are designed for various vehicles, such as the Ford Transit Custom, VW Transporter, or Mercedes Vito. It’s crucial to choose a kit that’s compatible with the van’s base model and year of manufacture. Some kits are designed for specific variants, so it’s essential to verify compatibility before making a purchase.
The choice of materials has a significant impact on the bodykit’s performance, durability, and cost. Common materials include:
The complexity of installation varies depending on the kit. Some considerations include:
Unless experienced, it’s advisable to have the kit installed by professionals at a certified body shop.
The overall cost of a van bodykit project includes:
It’s important to set a realistic budget that accounts for all these factors before embarking on a bodykit project.
Several manufacturers have made a name for themselves in the van bodykit industry, offering high-quality products to enhance the appearance and performance of various van models. Here’s a look at some of the top brands:
Musketeer has gained recognition for its innovative designs, particularly their rear aprons. Their products are made of ABS and feature a sleek black-look finish. One of their standout offerings is a rear apron with customizable inlets, available in red, black, white, or carbon look. Musketeer’s kits come with all necessary assembly materials, instructions, and parts certificates. They’re compatible with vans that have trailer couplings and are dispatched directly by the manufacturer.
VanKitz specialises in tuning and styling packages for medium-sized vans from popular brands like Ford, Nissan, Renault, and Vauxhall. They pride themselves on sourcing premium parts from top suppliers to enhance both the aesthetics and performance of vehicles. VanKitz caters to a wide range of van variants, including both short wheelbase (SWB) and long wheelbase (LWB) models, as well as those with twin and tailgate rear doors.
Irmscher offers comprehensive body kits for various Opel/Vauxhall models, including vans. They provide packages for vehicles with long wheelbase configurations, tailored for different rear door setups. Their kits typically include front spoiler lips, side skirts, and roof spoilers. Irmscher’s products are known for their compatibility with a wide range of Opel/Vauxhall models, from the Astra to the Vivaro.
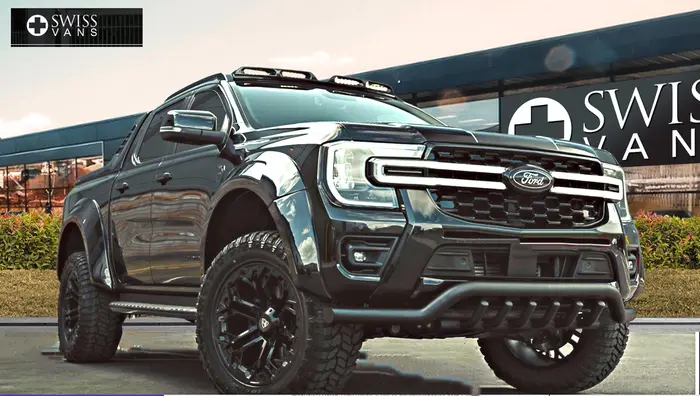
While specific information about Demon 4×4 isn’t provided in the given keypoints, they are a notable player in the van bodykit market. Their products likely cater to 4×4 vans and off-road enthusiasts, offering rugged and durable bodykit options for various van models.
Professional vs DIY Installation When it comes to installing a van bodykit, owners have two main options: professional installation or a DIY approach. Professional installation offers several advantages. Experienced technicians have the skills and tools to ensure a proper fit and finish. They can handle complex tasks like electrical work and plumbing, which is crucial for more extensive conversions. Professional installations often come with warranties and may increase the resale value of the van. On the other hand, DIY installation can be a rewarding experience for those with the necessary skills and time. It allows for complete control over the process and can significantly reduce costs. However, DIY installations require careful planning, a suitable workspace, and a realistic assessment of one’s abilities. It’s important to note that some insurance companies may not cover DIY builds, so this factor should be considered when making a decision. Painting and Finishing Proper painting and finishing are crucial for the appearance and longevity of a van bodykit. The process typically involves several steps:
For best results, it’s advisable to work in a clean, dust-free environment and allow sufficient drying time between coats. While DIY painting is possible, professional painting often yields superior results, especially for complex colour schemes or finishes. Regular Cleaning and Care To maintain the appearance and integrity of a van bodykit, regular cleaning and care are essential. Weekly waxing can help protect the paint and maintain its shine. Using a microfiber towel for cleaning prevents scratches and swirls in the paint. For wheels, special cleaners can remove brake dust and road grime without damaging the finish. It’s important to address minor dings and scratches promptly to prevent rust and further damage. However, avoid using pressure washers, as they can damage the paint and bodykit components. Instead, use car-specific shampoos and gentle cleaning methods to preserve the bodykit’s appearance and functionality over time.
Van bodykits have a significant impact on the appearance and functionality of various van models. From full body kits to individual components like front splitters and rear spoilers, these modifications offer van owners a way to personalise their vehicles and enhance their performance. The choice of materials, compatibility with specific van models, and the installation process are key factors to consider when selecting a bodykit. Top brands like Musketeer, VanKitz, and Irmscher provide high-quality options to suit different tastes and budgets. To get the most out of a van bodykit, proper installation and ongoing maintenance are crucial. Whether opting for professional fitting or taking the DIY route, careful attention to painting and finishing ensures a polished look. Regular cleaning and prompt attention to minor damages help maintain the bodykit’s appearance and functionality over time. With the right approach, a well-chosen van bodykit can transform a standard vehicle into a head-turning, personalised ride that reflects the owner’s style and meets their practical needs.
Van bodykits usually consist of components such as a front bumper, side skirts, and a rear bumper. Some kits may also feature additional aerodynamic elements like spoilers and diffusers. These parts can be crafted from various materials, including fibreglass, plastic, carbon fibre, or aluminium.
A widebody kit not only enhances the aesthetic appeal of a van but also allows for the installation of wider tyres. This increases the tyre contact area with the road, leading to improved traction and better handling, which is essential for performance enhancement.
Widebody kits are typically made from materials such as fibreglass, polyurethane, metal, or carbon fibre. Fibreglass is cost-effective and readily available but may be prone to cracking on impact. Polyurethane is favoured for its flexibility and resistance to damage.
The concept of the commercial front spoiler is often credited to European companies like Kamei and Zender. Kamei, a German firm, was an early innovator, introducing their body kits in the 1970s. Karl Meier, the founder of Kamei, developed the Tiefensteuer in 1953, an aerodynamic component that evolved into what is known today as the spoiler.
Pop in your details and the team will reply in minutes.